
TLDR: These White Chocolate Pumpkin Snickerdoodles combine the classic cinnamon-sugar crunch with a soft, pumpkin-spiced center that stays moist for days. The two most important tips are blotting the pumpkin puree to remove excess moisture and using a cookie scoop for evenly sized dough balls. This ensures perfectly puffy, bakery-style cookies every time you bake them.
I’ve made a lot of pumpkin cookies over the years, and most of them fall into one of two camps: dry and cakey, or flat and greasy.
These White Chocolate Pumpkin Snickerdoodles? They’re different.
They’re soft in the middle, slightly chewy around the edges, and the white chocolate is absolutely mandatory — don’t even think about skipping it. The first time I made these, my husband asked if I’d bought them from a bakery. That’s the kind of energy I want all my fall baking to have. If you’re looking for a pumpkin cookie that actually delivers on texture and flavor, this is it.
The first time I attempted pumpkin snickerdoodles, they spread into sad, flat puddles. The pumpkin adds too much moisture for a standard snickerdoodle dough to handle.
Batch two was better after I added the cream of tartar and baking soda combo (the classic snickerdoodle leavening duo), but they were still too puffy and cakey. The answer was a quick dough chill and making sure the butter was properly creamed with the sugar to create structure. The final version has a slight dome, a soft, tender crumb, and those gorgeous crinkly cracks on top. The white chocolate chips are little pockets of sweetness against the warm spices.
- Serves: 24 cookies
- Hands-On Time: 20 min | Total Time: 32 min
- Difficulty: Easy – perfect for a weekend baking session with the kids.
- Cost per serving: $0.45 – $0.60 per cookie
- Nutrition Estimate: 220 Calories, 2g Protein, 28g Carbs, 11g Fat, 6g Saturated Fat, 1g Fiber, 95mg Sodium per cookie
- Dietary Notes: Vegetarian. Can be made dairy-free with vegan butter and vegan white chocolate chips.
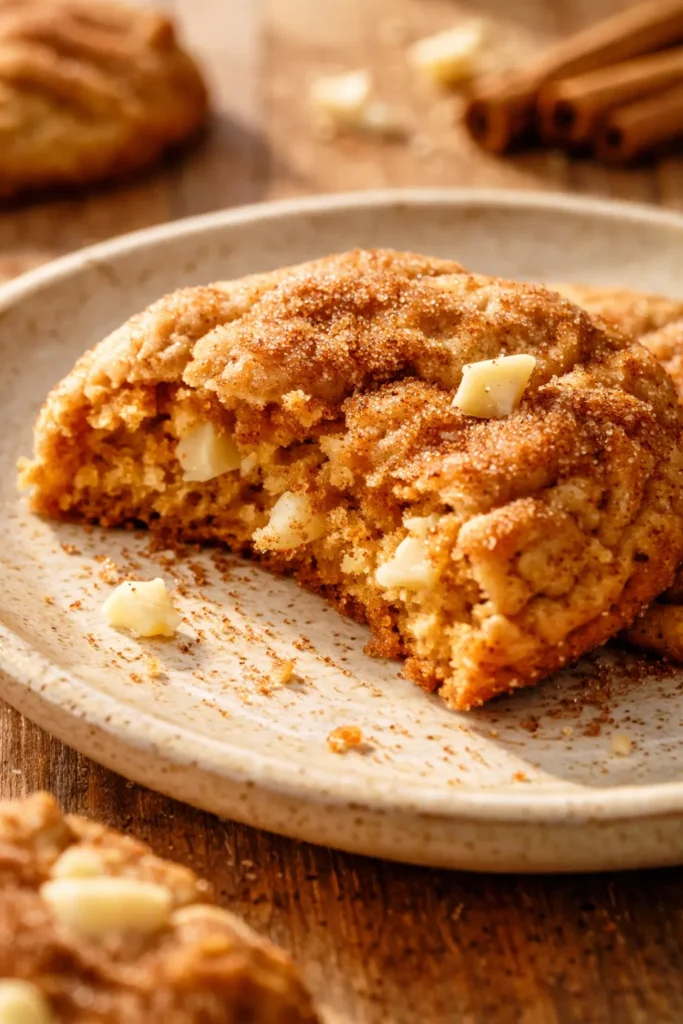
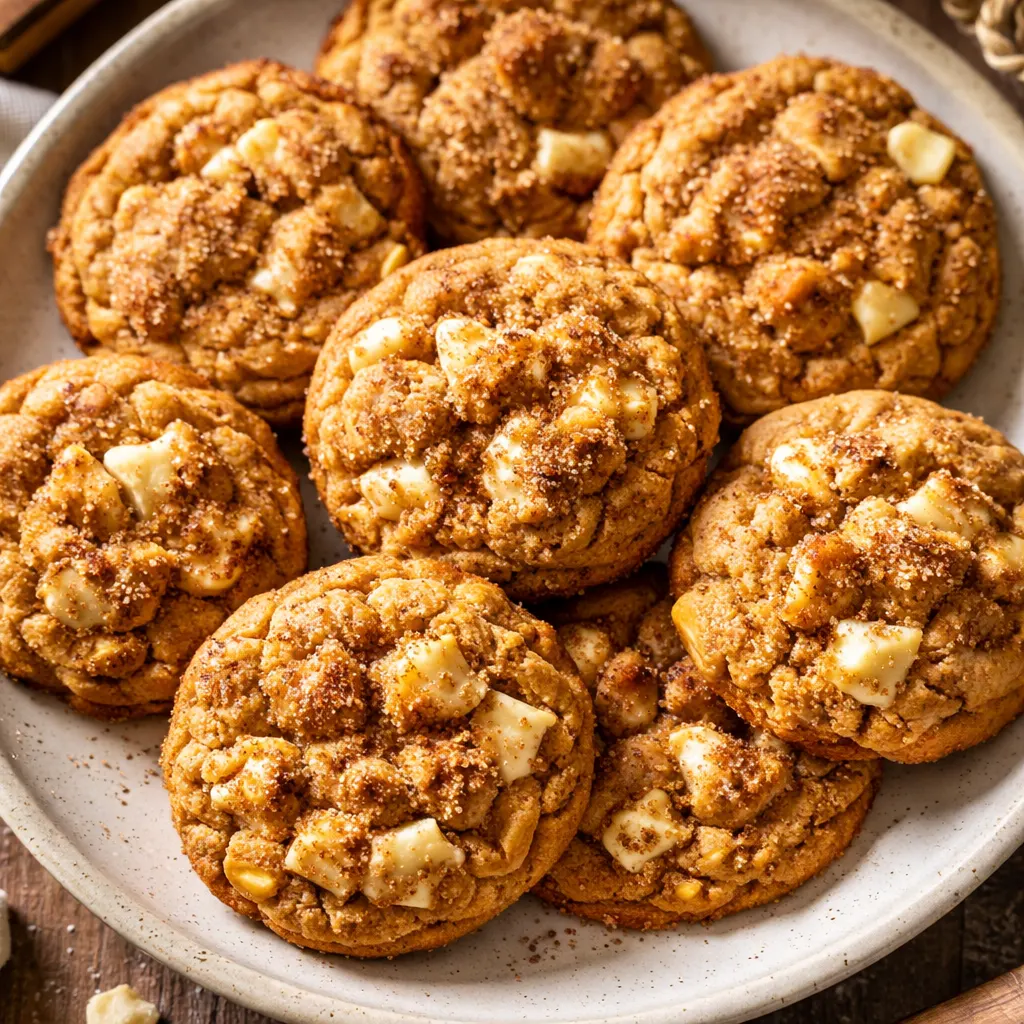
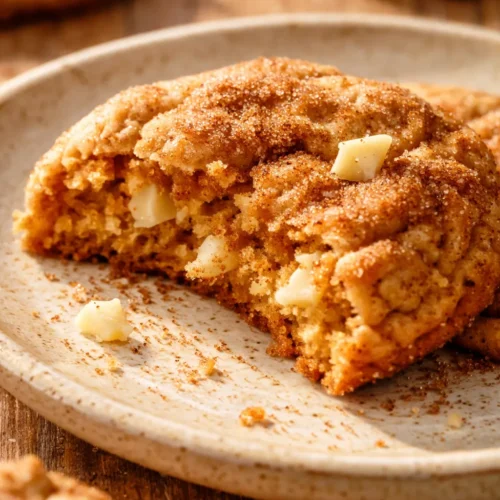
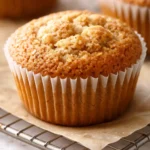
(Photo above: A top-down shot of a cooling rack piled high with golden-brown snickerdoodles dusted in cinnamon sugar. One cookie is broken in half, revealing a soft, tender crumb studded with white chocolate chips. The lighting is warm and golden, suggesting a cozy autumn afternoon.)
How I Tested and Developed This Recipe
I spent three weekends perfecting these cookies. The first batch was a disaster—flat, greasy puddles that spread into each other. I knew the pumpkin puree was the culprit, so I tried blotting it with paper towels. That helped, but they were still too cakey.
I scaled back the flour and added an extra tablespoon of butter for chewiness. The real breakthrough came when I added a 15-minute chill before baking. That gave me the perfect dome and crackly top.
I baked test batches at 350°F, 375°F, and 325°F. 350°F for 11 minutes was the sweet spot—the edges set while the centers stayed soft. My taste-testers (neighbors, family, and a skeptical mailman) unanimously voted this the best version.
The white chocolate chips? Non-negotiable. They melt into the warm dough and create creamy pockets that balance the spices beautifully.
Why Cream of Tartar & Pumpkin Make the Perfect Pair
Cream of tartar is the unsung hero of a great snickerdoodle. It provides that subtle tang that balances the sweetness of the sugar and white chocolate, and it reacts with the baking soda to give the cookies a perfectly light, chewy texture — not too cakey, not too flat. Unlike most cookies that rely solely on baking soda or powder, this combination creates a stable, tender crumb that holds its shape beautifully.
The pumpkin puree adds moisture without making the cookies greasy. It also helps activate the baking soda, which contributes to browning and a soft crumb. Together with the cinnamon, nutmeg, and ginger, the pumpkin makes these cookies taste like the essence of fall. I’ve found that 11 minutes is the perfect sweet spot for a chewy, soft center — any longer and they start to dry out.
Rolling the dough in cinnamon sugar right before baking creates a crunchy, crackly shell that contrasts beautifully with the soft, pillowy center. It’s the texture combination that makes snickerdoodles so universally beloved.
Ingredients You Need (and a Few Honest Notes)
- 2 3/4 cups all-purpose flour: Provides the structure for a sturdy but tender cookie. Spoon and level it for accuracy — too much flour makes them dense.
- 1 teaspoon baking soda: Helps the cookies spread slightly and become golden brown.
- 2 teaspoons cream of tartar: The secret to the classic snickerdoodle texture and tang. It stabilizes the cookie dough and prevents the sugar from crystallizing. Do not skip this — it’s what makes a snickerdoodle a snickerdoodle.
- 1/2 teaspoon salt: Balances the sweetness and enhances the warm spices.
- 1 teaspoon ground cinnamon & 1/2 teaspoon ground nutmeg & 1/4 teaspoon ground ginger: The warm spice trio that makes these taste like autumn in a cookie. Fresh spices make a big difference here.
- 1 cup unsalted butter, softened: Butter gives the best flavor and texture. Make sure it’s softened to room temperature for proper creaming.
- 1 1/2 cups granulated sugar (plus 1/4 cup for coating): Sweetens the dough and creates that crisp, crackly coating. The extra sugar for rolling is non-negotiable.
- 1/2 cup pumpkin puree: Adds moisture, color, and a subtle earthy sweetness. It’s also packed with Vitamin A, according to USDA nutritional data. Blot it with a paper towel if it seems watery to prevent spreading.
- 1 large egg: Binds everything together and adds structure. A room-temperature egg incorporates more evenly into the creamed butter.
- 2 teaspoons vanilla extract: Adds warmth and depth. It rounds out the pumpkin and spice flavors beautifully.
- 1 cup white chocolate chips: Creamy, sweet bursts in every bite. Use a good quality brand for the best melt and flavor. Yes, they’re worth it.
- 1 tablespoon ground cinnamon (for coating): Mixed with the extra sugar, this creates the iconic snickerdoodle crust that everyone loves.
Tools You’ll Need (I Promise It’s Minimal)
- Baking sheets: 1-2 heavy-duty sheets help prevent over-browning.
- Parchment paper: Non-negotiable for easy cleanup and preventing sticking.
- Medium mixing bowl, Large mixing bowl, Small mixing bowl: For dry and wet ingredients and the cinnamon-sugar coating.
- Whisk: To aerate the dry ingredients.
- Electric mixer: A stand mixer or hand mixer works perfectly for creaming the butter and sugar.
- Rubber spatula: For folding in the white chocolate chips and scraping down the bowl.
- Cookie scoop: A 1.5-tablespoon scoop makes evenly sized cookies that bake evenly.
- Wire rack: For cooling the cookies completely without soggy bottoms.
One note on mixers: I use my trusty hand mixer for this because the dough isn’t too stiff. If you’re using a stand mixer, use the paddle attachment and keep it on low speed.
Here’s How I Make Them (Start to Finish)
Preheat your oven and line those baking sheets — we’re about to get started. The smell of cinnamon and nutmeg will fill your kitchen within minutes.
- Preheat and Prep: Preheat your oven to 350°F (175°C). Line two baking sheets with parchment paper.
- Whisk Dry Ingredients: In a medium bowl, whisk together the flour, baking soda, cream of tartar, salt, cinnamon, nutmeg, and ginger. This ensures the spices are evenly distributed throughout the dough.
- Cream Butter and Sugar: In a large bowl, use your electric mixer to cream the softened butter and 1 1/2 cups of granulated sugar together until the mixture is light, fluffy, and pale in color (about 2-3 minutes). This incorporates air for a tender cookie.
- Add Wet Ingredients: Add the pumpkin puree, egg, and vanilla extract to the butter mixture. Mix on low speed until well combined. The mixture might look a little separated — that’s totally fine.
- Combine Wet and Dry: Gradually add the dry ingredients to the wet ingredients, mixing on low speed until just combined. Overmixing will develop the gluten and make the cookies tough.
- Fold in White Chocolate: Use a rubber spatula to gently fold the white chocolate chips into the dough until they are evenly distributed.
- Make the Coating: In a small bowl, stir together the remaining 1/4 cup of granulated sugar and 1 tablespoon of ground cinnamon.
- Scoop and Roll: Using a cookie scoop, scoop tablespoons of dough and roll them into balls. Roll each ball generously in the cinnamon-sugar mixture. Place them on the prepared baking sheets, spacing them about 2 inches apart.
- Bake: Bake for 10-12 minutes. The edges should be lightly golden and set, but the centers will still look slightly soft and puffy. For softer cookies, stick to the 10-minute mark.
- Cool and Serve: Let the cookies cool on the baking sheet for 5 minutes. This allows them to set up properly. Then, transfer them to a wire rack to cool completely. The centers will fall slightly, creating that perfect crinkly top.
Making These Ahead of Time (My Sunday Prep Routine)
I love scooping and freezing the dough balls so I can have fresh, warm cookies in under 15 minutes on a busy Tuesday. It’s a game-changer for after-school snacks or unexpected visitors.
- Fridge: You can refrigerate the scooped, un-baked dough balls for up to 3 days. Roll them in the cinnamon sugar just before baking for the freshest crunch.
- Freezer: Yes! Scoop the dough into balls, place them on a sheet pan, and freeze until solid. Transfer the frozen dough balls to a freezer bag. They’ll keep for up to 3 months.
- Reheat: Bake frozen dough balls directly from the freezer, adding 1-2 minutes to the baking time. For already-baked cookies, pop them in a 300°F oven for 5 minutes to re-crisp the edges and soften the center.
What I Wish I Knew When I Started Making These
- Blot That Pumpkin: Pumpkin puree can hold a lot of water. If it looks watery, pat it gently with a paper towel before adding it to the dough. This prevents the cookies from spreading too flat in the oven. Trust me on this one — it makes a huge difference.
- Don’t Skip the Chill: While this dough doesn’t require a long chill, a 15-minute rest in the fridge after scooping helps solidify the butter. This gives you thicker, puffier cookies instead of flat ones. Even if you forget, they’ll still taste amazing — I’ve done it.
- Use a Cookie Scoop: Using a spring-loaded cookie scoop ensures every cookie is the exact same size, so they bake evenly. No more burnt edges on some and raw centers on others!
- Bake One Test Cookie: I always bake one cookie first to see how it spreads. If it spreads too much, I chill the dough for longer. If it doesn’t spread enough, I slightly flatten the next batch of dough balls.
Easy Swaps for Every Kind of Baker
Dairy-Free Version
Use vegan butter in a 1:1 swap. Make sure your white chocolate chips are also dairy-free — brands like Enjoy Life or Pascha work beautifully.
Gluten-Free Option
Substitute the all-purpose flour with a high-quality 1:1 gluten-free baking blend (one that contains xanthan gum). The texture will be slightly more delicate but still incredibly delicious.
Nut-Free Note
This recipe is naturally nut-free! Just double-check your white chocolate chips to be sure they are processed in a nut-free facility if needed.
Spice It Up
For a chai-spiced twist, add 1/2 teaspoon of cardamom and a pinch of allspice to the dough.
Swap the Chips
Not a white chocolate fan? Swap in butterscotch chips, semi-sweet chocolate chips, or even dried cranberries for a tart pop of flavor.
Troubleshooting: Why Did My Pumpkin Snickerdoodles Turn Out Flat or Cakey?
Q: Why did my cookies spread into flat puddles?
A: This usually happens if the dough is too warm or the pumpkin puree was too watery. Make sure your butter is softened, not melted, and consider chilling the scooped dough balls for 20 minutes before baking. Blotting the pumpkin puree with a paper towel to remove excess moisture is also a lifesaver.
Q: Can I use pumpkin pie filling instead of pumpkin puree?
A: No, I don’t recommend it. Pumpkin pie filling is pre-sweetened and contains spices and thickeners that will throw off the balance of the dough. Always use 100% pure pumpkin puree for the best results.
Q: How do I know when they’re perfectly done?
A: Look for set, lightly golden edges and puffy, slightly soft centers. The top should no longer look wet, but it will still be soft when you touch it. They will continue to bake on the hot sheet pan for the 5-minute cooling period.
Q: Can I make these cookies completely vegan?
A: Yes, you can! Use a flax egg (1 tablespoon flaxseed meal + 3 tablespoons water) in place of the egg, and use a high-quality vegan butter and vegan white chocolate chips. The texture will be slightly more cakey, but just as delicious.
How Should I Store These White Chocolate Pumpkin Snickerdoodles?
Q: How long do these cookies last, and how should I store them?
A: Store them in an airtight container at room temperature for up to 5 days. To keep them extra soft, toss in a slice of bread — the cookies will absorb the moisture and stay pillowy.
Q: Can I freeze the baked cookies?
A: Absolutely! Bake and cool the cookies completely. Place them in a freezer-safe bag or container, separating layers with parchment paper. Freeze for up to 3 months. Thaw at room temperature or warm in a low oven.
Q: What’s the best way to reheat leftover cookies?
A: The microwave works for 10 seconds to get a soft, warm cookie. For a crispier edge, reheat in an air fryer at 300°F for 2-3 minutes. Avoid high heat, which can melt the white chocolate chips too quickly.
Q: What do you serve with these cookies?
A: They’re absolutely perfect with a hot cup of chai or coffee. For a fun dessert, sandwich a scoop of vanilla ice cream between two cookies for a pumpkin snickerdoodle ice cream sandwich. They also make a fantastic addition to a fall cookie platter.
These White Chocolate Pumpkin Snickerdoodles are the cookie I look forward to making all year long. They’re soft, they’re spiced, and they have that perfect crackly cinnamon-sugar shell. I hope they become a favorite in your kitchen, too.
If you make a batch, leave a comment and let me know how they turned out — I love hearing about your baking wins (and your happy taste-testers)!
📌 Save this soft pumpkin snickerdoodle recipe with white chocolate chips for your fall baking bucket list — it’s the perfect pumpkin cookie for cozy days and holiday cookie swaps!
Soft, Pillowy White Chocolate Pumpkin Snickerdoodles with a Cinnamon-Sugar Crunch
Equipment
- Baking sheets
- Parchment Paper
- Medium Mixing Bowl
- Large Mixing Bowl
- Small mixing bowl
- Whisk
- Electric Mixer
- Rubber spatula
- Cookie scoop
- Wire rack
Ingredients
Ingredients
- 2 3/4 cups all-purpose flour Provides the structure for a sturdy but tender cookie. Spoon and level it for accuracy — too much flour makes them dense.
- 1 teaspoon baking soda Helps the cookies spread slightly and become golden brown.
- 2 teaspoons cream of tartar The secret to the classic snickerdoodle texture and tang. It stabilizes the cookie dough and prevents the sugar from crystallizing. Do not skip this — it’s what makes a snickerdoodle a snickerdoodle.
- 1/2 teaspoon salt Balances the sweetness and enhances the warm spices.
- 1 teaspoon ground cinnamon The warm spice trio that makes these taste like autumn in a cookie. Fresh spices make a big difference here.
- 1/2 teaspoon ground nutmeg The warm spice trio that makes these taste like autumn in a cookie. Fresh spices make a big difference here.
- 1/4 teaspoon ground ginger The warm spice trio that makes these taste like autumn in a cookie. Fresh spices make a big difference here.
- 1 cup unsalted butter Butter gives the best flavor and texture. Make sure it’s softened to room temperature for proper creaming.
- 1 1/2 cups granulated sugar Sweetens the dough and creates that crisp, crackly coating. The extra sugar for rolling is non-negotiable.
- 1/4 cup granulated sugar For rolling the dough balls in cinnamon-sugar mixture.
- 1/2 cup pumpkin puree Adds moisture, color, and a subtle earthy sweetness. It’s also packed with Vitamin A, according to USDA nutritional data. Blot it with a paper towel if it seems watery to prevent spreading.
- 1 large egg Binds everything together and adds structure. A room-temperature egg incorporates more evenly into the creamed butter.
- 2 teaspoons vanilla extract Adds warmth and depth. It rounds out the pumpkin and spice flavors beautifully.
- 1 cup white chocolate chips Creamy, sweet bursts in every bite. Use a good quality brand for the best melt and flavor. Yes, they’re worth it.
- 1 tablespoon ground cinnamon For coating; mixed with the extra sugar, this creates the iconic snickerdoodle crust.
Instructions
- Preheat and Prep: Preheat your oven to 350°F (175°C). Line two baking sheets with parchment paper.
- Whisk Dry Ingredients: In a medium bowl, whisk together the flour, baking soda, cream of tartar, salt, cinnamon, nutmeg, and ginger. This ensures the spices are evenly distributed throughout the dough.
- Cream Butter and Sugar: In a large bowl, use your electric mixer to cream the softened butter and 1 1/2 cups of granulated sugar together until the mixture is light, fluffy, and pale in color (about 2-3 minutes). This incorporates air for a tender cookie.
- Add Wet Ingredients: Add the pumpkin puree, egg, and vanilla extract to the butter mixture. Mix on low speed until well combined. The mixture might look a little separated — that’s totally fine.
- Combine Wet and Dry: Gradually add the dry ingredients to the wet ingredients, mixing on low speed until just combined. Overmixing will develop the gluten and make the cookies tough.
- Fold in White Chocolate: Use a rubber spatula to gently fold the white chocolate chips into the dough until they are evenly distributed.
- Make the Coating: In a small bowl, stir together the remaining 1/4 cup of granulated sugar and 1 tablespoon of ground cinnamon.
- Scoop and Roll: Using a cookie scoop, scoop tablespoons of dough and roll them into balls. Roll each ball generously in the cinnamon-sugar mixture. Place them on the prepared baking sheets, spacing them about 2 inches apart.
- Bake: Bake for 10-12 minutes. The edges should be lightly golden and set, but the centers will still look slightly soft and puffy. For softer cookies, stick to the 10-minute mark.
- Cool and Serve: Let the cookies cool on the baking sheet for 5 minutes. This allows them to set up properly. Then, transfer them to a wire rack to cool completely. The centers will fall slightly, creating that perfect crinkly top.
Notes
Related posts:
 Low Calorie Banana Bread That Doesn’t Taste Like a Compromise — Finally
 Coconut Flour Banana Bread Muffins That Stay Moist for Days (Not Crumbly)
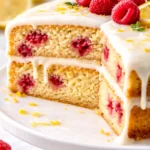 This Raspberry Lemon Cake With White Chocolate Is the Only Layer Cake You Need for Spring Celebrations
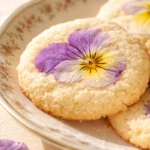 Pansy Sugar Cookies That Taste Like a Pastel Dream: Colorful, Buttery, and Surprisingly Easy to Make