
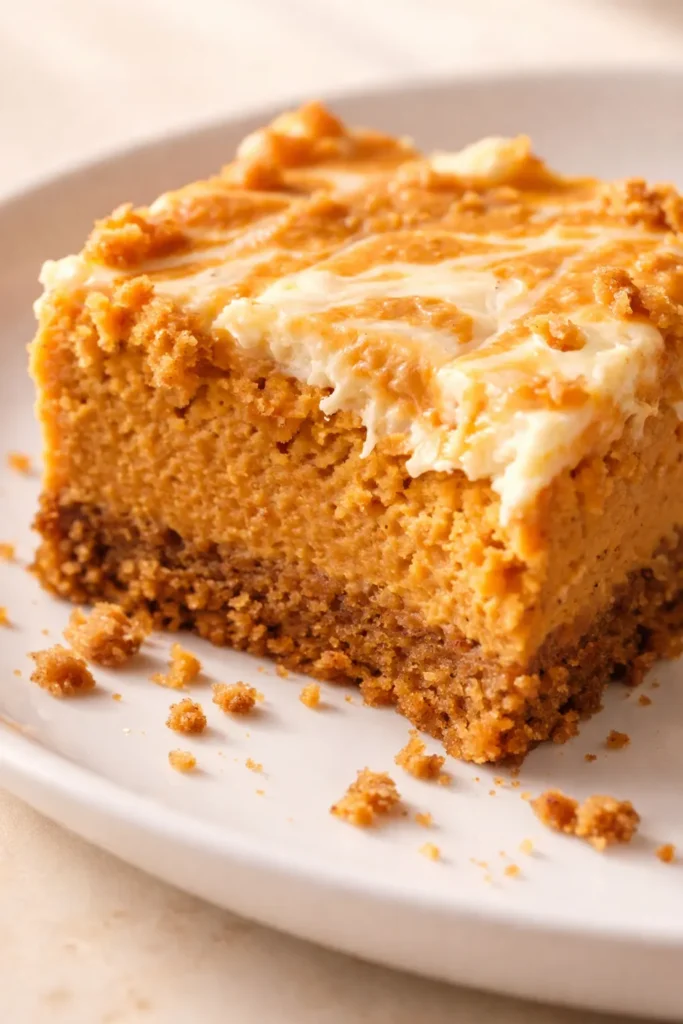
I’ve made more pumpkin desserts than I care to admit, and most of them land on the table with a shrug. These bars? They’re the ones my sister asked for before I even had the recipe memorized. That first bite — the creamy cheesecake swirl meeting the warm cinnamon and ginger pumpkin layer on top of a buttery, gluten-free crust — is the kind of thing that makes you close your eyes and just chew slowly. The aroma of toasted spices fills the kitchen as they bake, and the texture is pure velvet: no graininess, no cracks, just pure fall comfort.
How I Tested (and Tested Again) Until I Got It Right
The first time I tried making these, I rushed the chilling step and ended up with a sloppy mess that looked more like pudding than bars. Batch two, I baked them too long and got a cracked cheesecake layer that looked like a dried-out lake. For batch three, I finally nailed it: I let the cream cheese come to room temperature (no shortcuts), I used a light hand when swirling the cheesecake batter into the pumpkin layer, and I let them cool on the counter for a full hour before stashing them in the fridge. The result was a perfectly set, creamy bar with distinct pumpkin and cheesecake stripes that sliced cleanly and stayed tall. That’s the version I’m sharing today.
- Serves: 12 as dessert
- Hands-On Time: 20 min | Total Time: 3 hr 40 min
- Difficulty: Moderate — the swirl takes a gentle touch, but nothing too fussy
- Cost per serving: About $1.75
- Nutrition Estimate: 305 Calories, 5g Protein, 34g Carbs, 17g Fat, 9g Saturated Fat, 2g Fiber, 230mg Sodium per bar
- Dietary Notes: Gluten-free as written; can be made dairy-free with substitutions (see Variations)
(Photo above: Overhead shot of the finished bars on a rustic wooden cutting board, one bar lifted with a spatula to reveal the creamy layered interior, with a drizzle of caramel and a dusting of cinnamon. Natural side light from a window catches the swirl pattern.)
Why These Bars Are So Creamy and Never Grainy
Pumpkin desserts can end up dense and wet if you’re not careful. Here, the combination of heavy cream and a full can of pumpkin (not pumpkin pie filling) creates a custard-like pumpkin layer that sets up firm but stays silky. The trick is to use canned pure pumpkin — not pumpkin pie mix, which has added sugar and spices that throw off the balance. According to USDA nutritional data, pumpkin is packed with vitamin A and fiber, so you get a little nutrition with your indulgence.
The cream cheese layer gets a single egg and a modest amount of sugar, which makes it tangy rather than cloying. Swirling it into the pumpkin batter with a knife creates those beautiful ribbons — but go easy. Over-swirling turns everything muddy brown. Two or three gentle figure-eights are all you need.
Baking at 350°F for exactly 40 minutes hits the sweet spot: the edges set and the center stays slightly jiggly. It’s the residual heat from the oven and the cooling time that finish the set. Skip the hour-long cool on the counter and you’ll risk a cracked surface. I know — waiting is hard. But that hour is what gives you those clean, Instagram-worthy slices.
Everything You Need (And a Few Notes From Me)
- 2 cups gluten-free graham cracker crumbs, finely ground: The base of the crust. Make sure they’re finely ground — if the pieces are too big, the crust won’t hold together. I pulse store-bought crumbs in a food processor for 10 seconds just to be sure.
- 1/2 cup butter, melted: Binds the crumbs and adds richness. Use melted (not softened) so it coats every crumb evenly. I use salted butter because I like the contrast; unsalted works too — just add a pinch of salt to the crust.
- 15 oz canned pure pumpkin: Not pumpkin pie filling. This gives you the pure vegetable puree with no sugar or spice added, so you control the flavor.
- 3/4 cup heavy cream: Creates the creamy custard texture. Cold cream straight from the fridge is fine — it’ll mix into the pumpkin without curdling.
- 2 eggs: One for the pumpkin layer, one for the cheesecake layer. Both help set the bars without making them rubbery. I always crack eggs into a separate bowl first — just in case of shell bits.
- 3/4 cup sugar: Split between the two layers — 2/3 cup for the pumpkin, 1/3 cup for the cheesecake. This level keeps everything sweet but not dessert-candy sweet.
- 1 tsp vanilla extract: Two dashes total — one for each batter. It rounds out the spices and the tangy cream cheese.
- 1 tsp ground cinnamon, 1/4 tsp ground nutmeg, 1/4 tsp ground ginger, 1/8 tsp ground cloves: The classic pumpkin pie spice blend. If you have a pre-made pumpkin pie spice, use 1 1/2 tsp in place of the individual spices.
- 8 oz cream cheese, softened: Room temperature is non-negotiable. Cold cream cheese will leave lumps that never smooth out — trust me, I’ve tried. Leave it on the counter for at least 30 minutes before you start.
- 1 egg: For the cheesecake layer. Combined with the cream cheese and sugar, it creates a velvety topping.
What to Pull Out Before You Start
- Oven — preheat to 350°F
- Parchment paper — enough to line the bottom and two sides of a 9×13 baking dish (leave overhang to lift the bars out)
- 9×13 baking dish — glass or metal works fine
- Microwave — to melt the butter quickly
- Medium bowl — two of them (one for crust, one for cheesecake batter)
- Large bowl — for the pumpkin batter
- Spatula — preferably a firm one for pressing the crust
- Hand mixer (or stand mixer) — for smooth batters without lumps
- Knife — a table knife or small offset spatula for swirling
- Refrigerator — for the final chilling
Let’s Make It (Step by Step)
Set your oven to 350°F and line the 9×13 dish with parchment paper, leaving a couple of inches hanging over the long sides — that will be your “lift” handle later.
- Make the crust: Melt the butter in a microwave-safe bowl in 30-second bursts (30 seconds, stir, 15 more if needed). In a medium bowl, stir together the melted butter and the gluten-free graham cracker crumbs until all crumbs are moistened. Dump the mixture into the parchment-lined dish and press it into an even layer with the back of a spatula or a flat-bottomed measuring cup. Press firmly — loose crumbs will fall apart when you cut the bars.
- Mix the pumpkin batter: In a large bowl, combine the pumpkin puree, heavy cream, 2 eggs, 2/3 cup sugar, 1 teaspoon vanilla, cinnamon, nutmeg, ginger, and cloves. Use a hand mixer on medium speed — or a stand mixer with the paddle attachment — and beat until smooth, about 45 seconds. No lumps allowed here. Pour the batter over the crust and spread it all the way to the edges with a spatula.
- Mix the cheesecake batter: In a medium bowl, combine the softened cream cheese, 1 egg, the remaining 1/3 cup sugar, and 1 teaspoon vanilla. Beat with the hand mixer (or stand mixer) on medium speed until smooth and no streaks remain — about 30 seconds. Do not overbeat, or the cream cheese will get too airy and cause cracks later.
- Swirl it together: Dollop spoonfuls of the cheesecake batter randomly over the pumpkin layer. Take a table knife and gently drag it through the dollops in a figure-eight motion — just two or three passes. Stop when you see pretty swirls; if you keep going, the two layers will blend into one.
- Bake: Place the dish in the preheated oven and bake for 40 minutes. The edges should look set and slightly puffed, and the center will jiggle when you nudge the pan — that’s okay. Resist the urge to bake it until the center is completely firm, or it will crack.
- Cool: Remove the dish from the oven and set it on a wire rack. Let it cool at room temperature for exactly one hour — set a timer so you don’t forget. Then transfer the dish to the refrigerator and chill for at least two hours, preferably three. This step is crucial for clean slices.
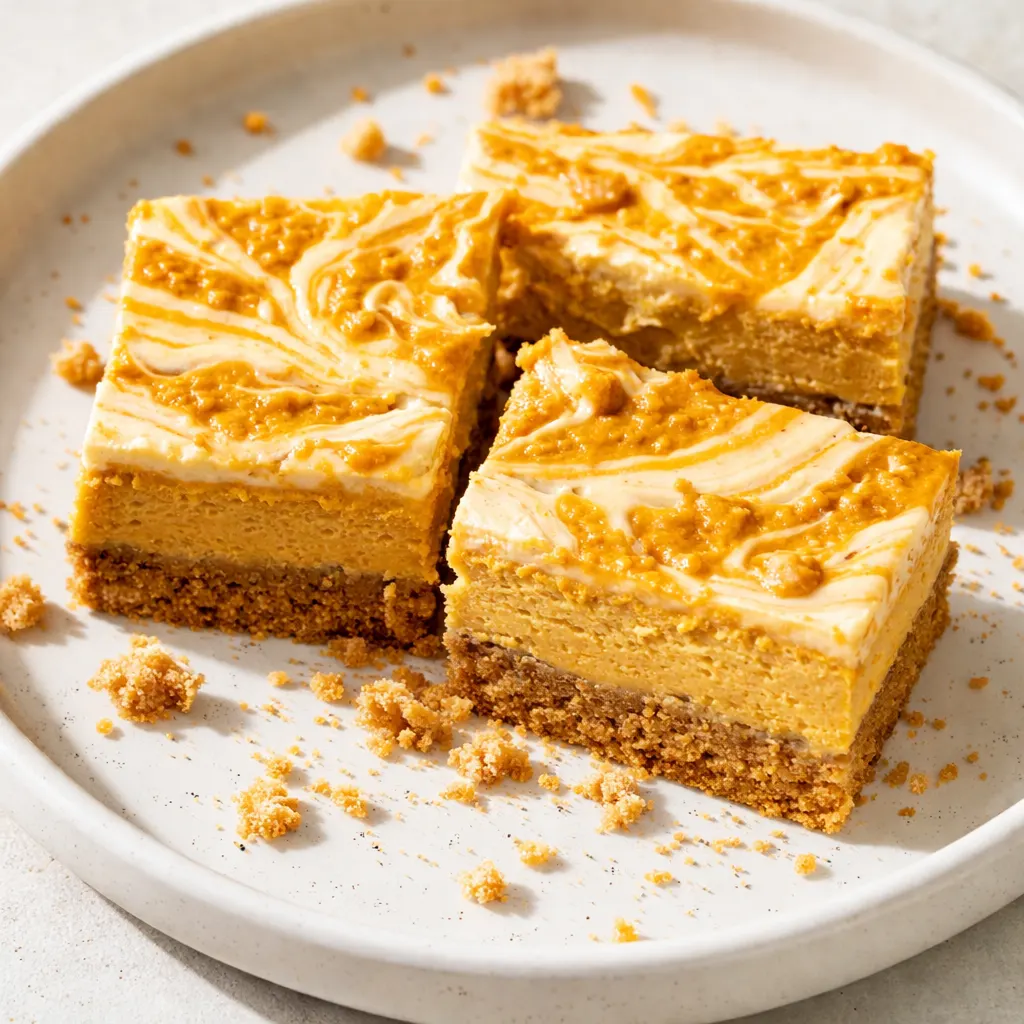
- Slice and serve: Once fully chilled, grab the overhanging parchment paper and lift the entire slab out of the dish. Set it on a cutting board and use a sharp chef’s knife to cut it into 12 bars (3 rows by 4 rows). Wipe the knife between cuts for the cleanest look. Serve cold or at room temperature.
Sunday Prep = Stress-Free Fall Dessert
These bars are the ultimate make-ahead dessert — they actually get better after a day in the fridge because the flavors meld. I’ll often bake them on Saturday afternoon, let them cool and chill overnight, then slice and serve on Sunday. The hardest part is keeping my husband from sneaking a corner piece before dinner.
- Fridge: Store bars in an airtight container with a layer of parchment between each row. They’ll stay fresh for up to five days. Let them sit at room temperature for about 15 minutes before serving for the creamiest texture.
- Freezer: Yes! Wrap individual bars tightly in plastic wrap, then place in a freezer-safe bag. Freeze for up to three months. Thaw in the fridge overnight — do not microwave, or the cream cheese layer will weep.
- Reheat: Honestly, these are best cold or at room temp. If you must warm them, pop one in a 300°F oven for 5 minutes — but no longer, or the crust gets soft.
Things I Wish I’d Known the First Time
- Press that crust like you mean it. I used to be too gentle, and my bars would crumble at the bottom. Use a flat-bottomed measuring cup and press hard — especially into the corners. The firmer the crust, the easier it is to lift and cut.
- Room temperature cream cheese is a hill I’ll die on. If you try to beat cold cream cheese, you’ll get lumps that won’t smooth out no matter how long you mix. Let it sit out for 30–45 minutes. Microwaving cream cheese to soften it often melts the edges — avoid that.
- Don’t overmix the cheesecake batter. Just mix until the sugar is dissolved and the mixture is smooth. Whipping in too much air creates bubbles that expand in the oven and cause cracks. Even if you overmix, the bars will still taste delicious—they just might have a few small cracks. No one will mind after the first bite.
- Patience with cooling pays off. I know you want to taste it warm, but slicing into these bars even slightly warm will result in a gooey mess. The full one-hour room-temperature cool followed by at least two hours in the fridge is what gives you those clean, sharp edges. Trust me on this one.
Swaps That Actually Work
- Dairy-free version: Use a dairy-free cream cheese (like Miyoko’s or Violife) and replace the heavy cream with full-fat coconut cream. The texture will be slightly softer, but the flavor is still fantastic.
- Regular graham cracker crust: If you don’t need it gluten-free, swap in regular graham cracker crumbs (same amount). No other changes needed.
- Pumpkin pie spice instead of singles: Replace the cinnamon, nutmeg, ginger, and cloves with 1 1/2 teaspoons of pumpkin pie spice. Add it to the pumpkin batter the same way.
- Less sweet version: Reduce the pumpkin layer sugar to 1/2 cup and the cheesecake sugar to 1/4 cup. The bars will still be sweet enough, with a more pronounced pumpkin and tangy cream cheese flavor.
- Pecan streusel topping: Before baking, sprinkle a mixture of 1/2 cup chopped pecans, 2 tablespoons brown sugar, and 1 tablespoon melted butter over the top. It adds a crunchy contrast.
Troubleshooting: Why Did My Pumpkin Cheesecake Bars Crack?
Q: Why did my cheesecake layer crack on top?
A: The most common culprit is overbaking. When the center sets completely in the oven, the moisture evaporates and leaves cracks. To fix it next time, take the bars out when the center still jiggles slightly — just the edges should look set. Also, make sure your cream cheese was at room temperature; cold cream cheese can cause the filling to expand unevenly.
Q: Can I use pumpkin pie filling instead of pure pumpkin?
A: You can, but you’ll need to adjust the sugar and spices. Pumpkin pie filling already has sugar and spices added, so reduce the sugar in the pumpkin batter to 1/4 cup and skip the cinnamon, nutmeg, ginger, and cloves. The texture will be slightly denser.
Q: How do I know when the bars are done?
A: Bake for 40 minutes at 350°F. The edges should be puffed and slightly golden, while the center will jiggle like Jell-O when you gently shake the pan. That jiggle is your doneness indicator — it will set during cooling. If you insert a skewer into the center, it should come out with a few moist crumbs attached (not wet batter).
Q: Can I make these vegan?
A: Yes, with some tweaks. Use a vegan cream cheese (like Kite Hill) and replace the eggs with 1/4 cup unsweetened applesauce for the pumpkin layer and 1/4 cup silken tofu blended until smooth for the cheesecake layer. Use a vegan butter in the crust. The texture will be a little less firm, but the flavor is still delicious — just chill them an extra hour for better sliceability.
How Do You Store These Bars? Can They Be Frozen?
Q: How long do these pumpkin cheesecake bars last, and how should I store them?
A: They’ll keep in the fridge for up to five days, stored in an airtight container with parchment between layers. I find they actually taste better on day two because the spices have time to meld. If you live in a humid climate, place a paper towel inside the container to absorb excess moisture and keep the crust from getting soggy.
Q: Can I make these bars ahead of time or freeze them?
A: Absolutely. You can bake them up to two days before serving and keep them chilled. To freeze, wrap each bar individually in plastic wrap, then place them in a zip-top freezer bag. They’ll keep for up to three months. Thaw overnight in the fridge — never microwave to thaw, or the cream cheese layer will separate.
Q: What’s the best way to reheat these bars?
A: I actually prefer them cold or at room temperature — the creamy layers shine that way. If you want a warm dessert, place a single bar on a microwave-safe plate and heat for 10 seconds at 50% power, just to take the chill off. Or pop it in a 300°F oven for 5 minutes — but watch the crust doesn’t get too soft.
Q: What do you serve with these bars?
A: A dollop of whipped cream (or coconut whipped cream for dairy-free) is the classic pairing. I also love a drizzle of salted caramel sauce and a sprinkle of flaky sea salt — the salty-sweet combo is next-level. For a non-traditional twist, try a spoonful of cranberry relish on the side; the tartness cuts through the richness.
These bars have become my go-to for Thanksgiving potlucks, Friendsgiving dinners, and even lazy Sunday baking when I just want the house to smell like fall. They’re forgiving enough for a beginner baker but impressive enough to serve to company.
If you try them, drop a comment below — I love hearing how it goes for you! Tag me on Pinterest so I can see yours!
📌 Save this gluten-free pumpkin pie cheesecake bars recipe for your fall baking — they’re creamy, spiced, and perfect for holiday gatherings and weekend dessert cravings.

Gluten Free Pumpkin Pie Cheesecake Bars That Are Creamy, Spiced, and Totally Indulgent
Equipment
- Oven
- Parchment Paper
- 9×13 baking dish
- Microwave
- Medium Bowl
- Large Bowl
- Spatula
- Hand Mixer
- Knife
- Refrigerator
Ingredients
Crust
- 2 cups gluten-free graham cracker crumbs, finely ground
- 1/2 cup butter, melted
Pumpkin Layer
- 15 oz canned pure pumpkin not pumpkin pie filling
- 3/4 cup heavy cream
- 2 large eggs
- 2/3 cup sugar
- 1 teaspoon vanilla extract
- 1 teaspoon ground cinnamon
- 1/4 teaspoon ground nutmeg
- 1/4 teaspoon ground ginger
- 1/8 teaspoon ground cloves
Cheesecake Layer
- 8 oz cream cheese, softened
- 1 large egg
- 1/3 cup sugar
- 1 teaspoon vanilla extract
Instructions
- Make the crust: Melt the butter in a microwave-safe bowl in 30-second bursts (30 seconds, stir, 15 more if needed). In a medium bowl, stir together the melted butter and the gluten-free graham cracker crumbs until all crumbs are moistened. Dump the mixture into the parchment-lined dish and press it into an even layer with the back of a spatula or a flat-bottomed measuring cup. Press firmly — loose crumbs will fall apart when you cut the bars.
- Mix the pumpkin batter: In a large bowl, combine the pumpkin puree, heavy cream, 2 eggs, 2/3 cup sugar, 1 teaspoon vanilla, cinnamon, nutmeg, ginger, and cloves. Use a hand mixer on medium speed — or a stand mixer with the paddle attachment — and beat until smooth, about 45 seconds. No lumps allowed here. Pour the batter over the crust and spread it all the way to the edges with a spatula.
- Mix the cheesecake batter: In a medium bowl, combine the softened cream cheese, 1 egg, the remaining 1/3 cup sugar, and 1 teaspoon vanilla. Beat with the hand mixer (or stand mixer) on medium speed until smooth and no streaks remain — about 30 seconds. Do not overbeat, or the cream cheese will get too airy and cause cracks later.
- Swirl it together: Dollop spoonfuls of the cheesecake batter randomly over the pumpkin layer. Take a table knife and gently drag it through the dollops in a figure-eight motion — just two or three passes. Stop when you see pretty swirls; if you keep going, the two layers will blend into one.
- Bake: Place the dish in the preheated oven and bake for 40 minutes. The edges should look set and slightly puffed, and the center will jiggle when you nudge the pan — that’s okay. Resist the urge to bake it until the center is completely firm, or it will crack.
- Cool: Remove the dish from the oven and set it on a wire rack. Let it cool at room temperature for exactly one hour — set a timer so you don’t forget. Then transfer the dish to the refrigerator and chill for at least two hours, preferably three. This step is crucial for clean slices.
- Slice and serve: Once fully chilled, grab the overhanging parchment paper and lift the entire slab out of the dish. Set it on a cutting board and use a sharp chef’s knife to cut it into 12 bars (3 rows by 4 rows). Wipe the knife between cuts for the cleanest look. Serve cold or at room temperature.
Notes
Related posts:
 Low Calorie Banana Bread That Doesn’t Taste Like a Compromise — Finally
 Coconut Flour Banana Bread Muffins That Stay Moist for Days (Not Crumbly)
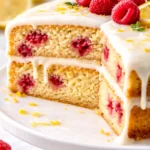 This Raspberry Lemon Cake With White Chocolate Is the Only Layer Cake You Need for Spring Celebrations
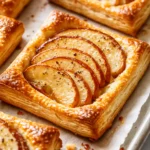 Puff Pastry Apple Tarts That Look Like a Bakery Made Them — with Only 15 Minutes of Effort