
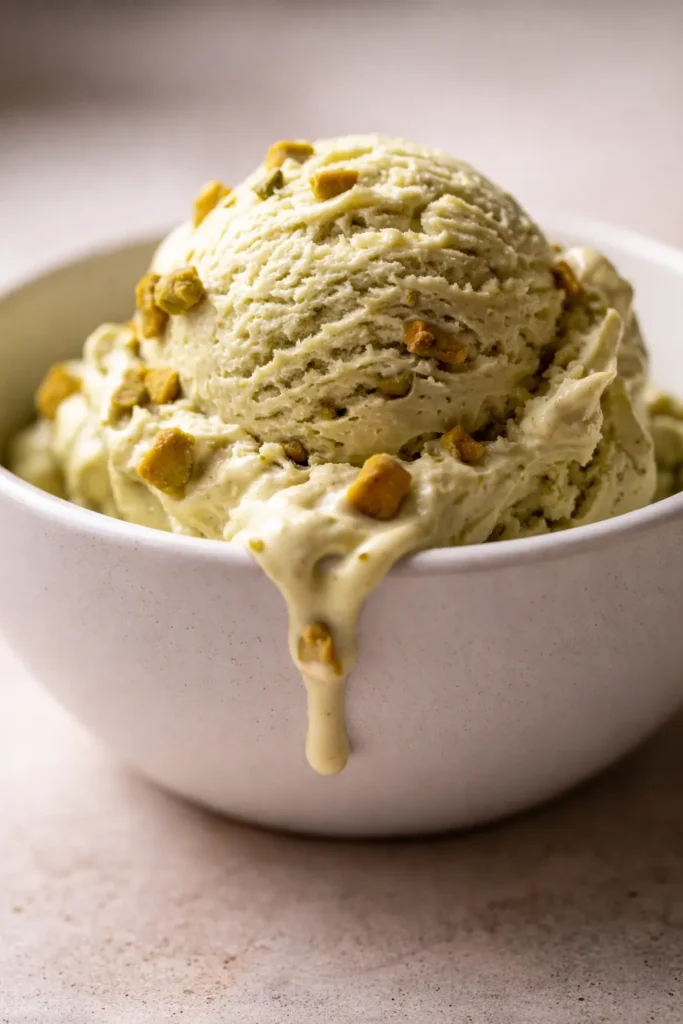
TLDR: This Ninja Creami pistachio ice cream uses real shelled pistachios blended straight into the base for an authentic nutty flavor and natural pale-green color. The single most important step is freezing the pint for a full 24 hours before churning — anything less yields a crumbly, icy texture. Expect a dense, scoopable ice cream with rich pistachio taste in every bite, no artificial coloring needed.
That first spoonful — when the blade cuts through and you see that soft, creamy green with tiny flecks of real pistachio — honestly made me squeak out loud the first time I got it right. I’ve been on a Ninja Creami kick for about a year now, and pistachio was the flavor I kept circling back to, hoping I could nail it without a boxed mix or a bottle of extract that tastes more like almond than actual nut. The problem with most homemade pistachio ice creams is they either come out tasting like sweet milk with a whisper of nut, or they turn that weird neon green that nobody’s grandmother ever made. This version? It tastes like the real thing because it is the real thing. Just pistachios, dairy, a little sugar, and a whole lot of patience for the freezer.
Testing This Recipe: From Gritty Pebbles to Silky Scoops
I’m not going to pretend I nailed this on the first try. The first batch was a disaster — I froze the pint for maybe 14 hours instead of the full 24, and the result was a crumbly, almost icy mess that the Creami could not save. It just spun into sad little pebbles.
The second batch I let go the full 24 hours, and the difference was night and day: a silky, dense scoop with that signature pistachio richness that coats your tongue. Third time, I added the dark chocolate chips after the respin, and that combination — creamy nut base with little bitter-sweet pockets of chocolate — became my go-to.
I tested three more batches to dial in the blender time, the milk-to-cream ratio, and the exact respin technique. Now I keep a pint in the freezer at all times.
- Serves: 4 as dessert
- Hands-On Time: 10 min | Total Time: 24 hrs 10 min
- Difficulty: Easy, even for first-time Creami owners
- Cost per serving: ~$1.50
- Nutrition Estimate: 290 Calories, 6g Protein, 25g Carbs, 20g Fat, 9g Saturated Fat, 2g Fiber, 60mg Sodium per serving
- Dietary Notes: Naturally gluten-free / Adaptable for dairy-free with coconut cream
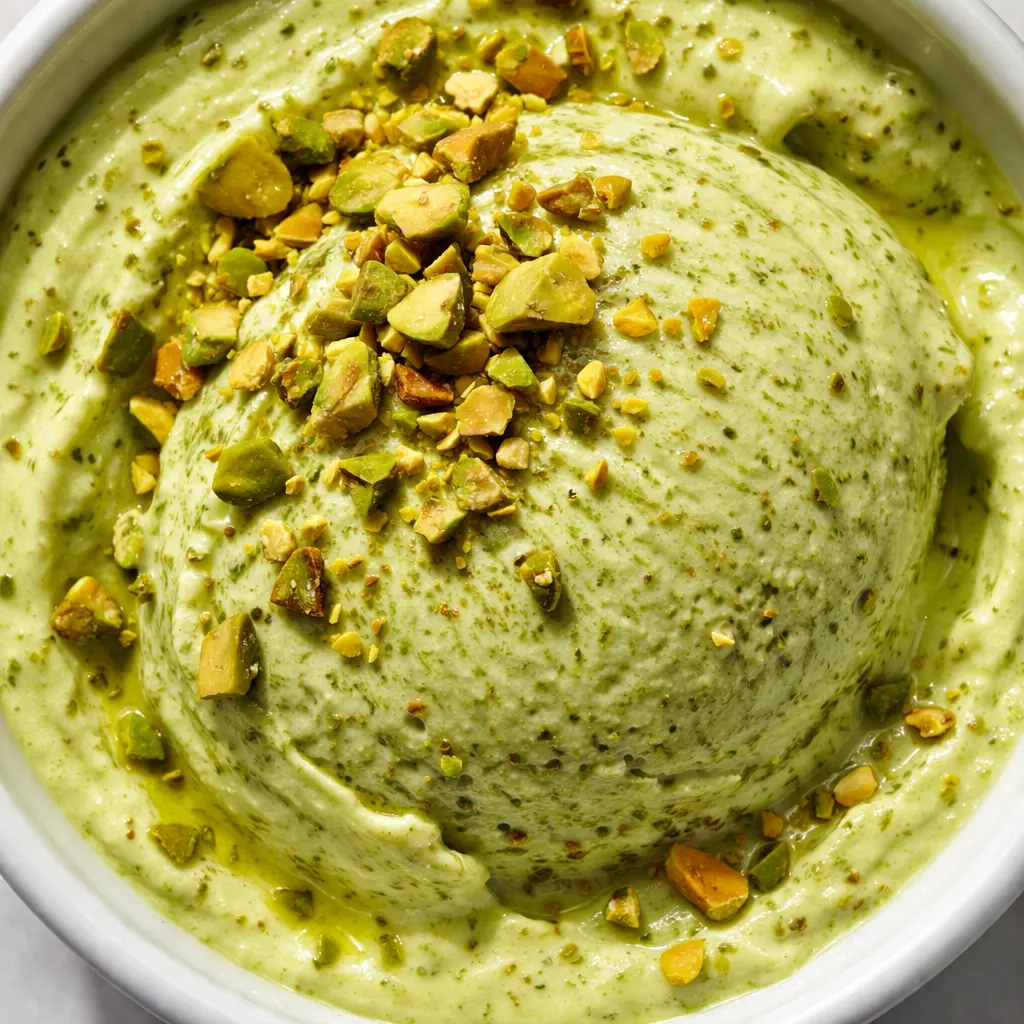
(Photo above: overhead shot of two scoops of pale green pistachio ice cream in a white ceramic bowl, scattered with chopped pistachios and dark chocolate chips, natural window light from the left casting soft shadows, a linen napkin folded beneath.)
Why Blending Real Pistachios Changes Everything
Most pistachio ice creams rely on almond extract or a few sad nuts stirred in at the end. Blending a full ¾ cup of shelled pistachios directly into the dairy base means every single bite carries that toasty, slightly sweet nut flavor from start to finish. One serving provides roughly 15 percent of the daily recommended intake of protein, according to USDA nutritional data, which also helps give this ice cream a creamier mouthfeel than standard dairy-only recipes.
The non-obvious step here is letting the blender run long enough — a full 60 to 90 seconds — until the mixture looks smooth and almost silky. If you stop too early, you’ll end up with gritty bits of nut that never fully incorporate, and the texture during churning will be off. I’ve done it. It’s not terrible, but it’s not the luxurious scoop you’re after.
What this produces is an ice cream that tastes like you spent an afternoon roasting and shelling nuts, even though the blender does all the work in under two minutes.
Everything You Need (Plus a Few Notes From Me)
- ¾ cup shelled pistachios: The star of the show — buy them already shelled to save time, and look for unsalted ones so you control the sweetness. Roasted or raw both work, but roasted gives a deeper, toastier flavor that I personally prefer.
- 1 cup whole milk (or Fairlife 2% milk): Whole milk gives the richest base, but Fairlife 2% works beautifully because it’s thicker than regular 2% and has a touch more protein. Skim milk will make the ice cream icier — don’t go that low.
- ½ cup heavy cream: This is what gives the ice cream that dense, scoopable texture. Without it, you’d end up with a frozen slushy instead of real ice cream. Make sure it’s cold from the fridge when you blend.
- ⅓ cup granulated sugar: Just enough to balance the savory pistachio notes without overwhelming them. Don’t reduce this — sugar is key for texture and scoopability in the Creami.
- 1 teaspoon vanilla extract: Rounds out the nutty flavor and adds a warm background note. Pure vanilla, not imitation — you’ll taste the difference.
- 1 tablespoon milk or cream (for respin): This little addition is the secret to fixing a crumbly or dry-looking pint after the first churn. Keep a splash in the fridge while the base freezes so you don’t forget.
- Chopped pistachios (topping): Adds crunch and a visual pop. Chop them coarsely so they stay crunchy instead of disappearing into the base.
- Dark chocolate chips (topping): The bitter-sweet contrast against the creamy pistachio base is absolutely perfect. Use mini chips if you have them — they distribute more evenly.
What to Pull Out Before You Start
- Blender — any countertop blender works; a high-speed one will get the smoothest result in about 45 seconds
- Ninja Creami pint container — the specific pint that comes with your Creami, with its lid
- Ninja Creami outer bowl and outer lid — the assembly that holds the pint during churning
- Spoon — for checking texture and creating the hole for the respin step
That’s it. No ice cream maker required beyond the Creami itself.
Here’s How I Do It
This method is almost embarrassingly simple once the base is blended and frozen. The real work is just waiting for that 24-hour mark.
- Blend: Add the shelled pistachios, whole milk, heavy cream, granulated sugar, and vanilla extract to your blender. Blend on high for 60–90 seconds until the mixture is completely smooth and creamy. The color will look like a muted, almost sage-y green — totally normal since there’s no artificial coloring. Don’t panic if it looks a little dull; the final color is prettier once churned.
- Freeze: Pour the blended mixture into the Ninja Creami pint container. Secure the lid tightly — I mean really click it on — and place it on a level surface in your freezer. Let it freeze for at least 24 hours until it’s completely solid. I know 24 hours feels like forever, but less time means an icy, crumbly texture every single time.
- Churn (first pass): Take the frozen pint out, remove the lid, and place it into the Ninja Creami outer bowl. Attach the outer lid, lock the assembly into the machine, and run the Ice Cream function. Let the machine complete the full cycle — it takes about 2 minutes. You’ll hear it grinding at first; that’s normal.
- Check and respin: Open the lid and look at the texture. If it looks crumbly, dry, or almost like soft snow, use a spoon to create a small hole right in the center of the ice cream — about an inch deep. Pour in 1 tablespoon of milk or cream. Reattach the lid and run the Respin function. This step is the difference between good ice cream and great ice cream. I’ve never skipped it.
- Add toppings (optional): If you want chopped pistachios or dark chocolate chips mixed in, sprinkle them on top after the respin, then use the Creami’s Mix-In function if your model has it, or just gently fold them in with a spoon. Don’t overmix — you want pockets of chocolate and crunch, not a muddy swirl.
How I Meal Prep This for the Week
I almost always make two pints at once — one plain for my husband, one with dark chocolate chips for me. The base blends up in about two minutes, so doubling takes almost no extra effort. I label the lids with a Sharpie so I know which is which after a day in the freezer.
- Fridge: Not applicable — the base goes straight to the freezer after blending. Leftover blended base can sit in the fridge for up to 24 hours before freezing, but I prefer to freeze it immediately.
- Freezer: Yes — the finished ice cream keeps beautifully in the Creami pint with the lid on for up to 3 weeks. After that, the texture starts to get icy. Pro tip: press a piece of parchment paper directly onto the surface before freezing to prevent freezer burn.
- Reheat: The Creami is designed for frozen pints. To re-scoop a pint that’s been in the freezer for a few days, let it sit on the counter for 5–7 minutes, then run the Respin function for 15–20 seconds to restore the creamy texture.
Things I Wish I’d Known the First Time
- Don’t rush the freeze time: The biggest mistake I made was thinking 18 hours was close enough. It’s not. That extra 6 hours is what allows the base to freeze completely solid so the Creami blade can cut through it properly. If your pint still feels slightly soft or gives a little when you press on the lid, it’s not ready. Wait the full 24 hours. Trust me on this one.
- Your blender matters more than you think: The first batch I made in a cheap bullet blender came out gritty because the nuts never fully broke down. A decent countertop blender that can handle nuts will give you a silky-smooth base. If your blender struggles, soak the pistachios in the milk for 30 minutes before blending to soften them up.
- The respin trick is not optional: Even when you nail the 24-hour freeze, the first pass on the Ice Cream setting often leaves a slightly crumbly or dry-looking texture. That one tablespoon of milk or cream and a 30-second respin transforms it into the scoopable, dense texture you’re actually after. I know it sounds silly, but it works every time. Even if you mess up the freeze time a little, a respin will save it — I’ve done it.
- Let the pint temper before scooping: If you’re serving straight from the freezer, let the pint sit on the counter for 5 minutes. It makes scooping infinitely easier and the texture softer and more luxurious. Straight from the freezer, it’s a little too firm for my taste.
Swaps That Actually Work
- Dairy-free version: Swap the whole milk for full-fat canned coconut milk and the heavy cream for coconut cream. The texture will be slightly less dense but still very good. One note: the coconut flavor will come through a little, so make sure you’re in the mood for a tropical-tinged pistachio.
- Nut-free version: This one’s tricky because pistachio is the main flavor. You could try sunflower seeds or pepitas instead, but the taste and color will be completely different — more savory and earthy. Not a direct swap, but worth mentioning for allergy households.
- Lower sugar version: Reduce the sugar to ¼ cup. The ice cream will be slightly less scoopable straight from the freezer and a little firmer, but a longer temper (8–10 minutes on the counter) fixes it. I’ve done this; it’s fine, just not as creamy.
- Extra nutty version: Add 2 tablespoons of pistachio butter (not paste) along with the nuts in the blender. It intensifies the flavor significantly and makes the base even creamier. This is my secret-weapon version for guests.
- Fancy guest version: Swirl in a ribbon of honey or salted caramel after the respin instead of chocolate chips. The sweet-salty combo is incredible. Use a spoon to gently fold it in — don’t overmix or it will disappear.
Troubleshooting: Common Pistachio Ice Cream Problems
Q: Why did my ice cream come out crumbly and dry instead of creamy?
A: The most common cause is not freezing the pint for the full 24 hours. I know it’s tempting to check it at hour 18, but the base needs to be completely solid for the Creami to work properly. If it’s still slightly soft in the center, the blade will just push it around instead of shaving it into creamy layers. The fix: let it freeze the full 24 hours, and use the respin step with 1 tablespoon of milk or cream. That almost always saves a borderline batch.
Q: Can I use salted pistachios instead of unsalted?
A: Yes, but reduce the added salt elsewhere — and honestly, unsalted gives you more control. If all you have is salted, use them and skip any salt in the recipe. The ice cream will have a slight savory edge that some people actually love. Just be aware the flavor will lean more toward a salted-nut profile than a sweet dessert.
Q: How do I know when the base is frozen enough to churn?
A: The pint should feel rock-solid when you press on the lid — no give at all, and it should feel colder than the other items in your freezer. If you shake it gently, there should be zero sloshing or movement. If you’re unsure, err on the side of longer. I’ve left a pint for 36 hours and it was perfect. When in doubt, wait.
Q: Can I make this dairy-free or vegan?
A: Yes. Use full-fat canned coconut milk and coconut cream instead of the dairy. The texture will be a little less dense but still creamy. For a vegan version, you’ll also need to make sure your sugar is vegan (most granulated sugar is, but some brands use bone char). The coconut flavor will be present, so expect a pistachio-coconut blend rather than a pure pistachio taste.
How Do You Store Ninja Creami Pistachio Ice Cream?
Q: How long does this ice cream last, and how should I store it?
A: In the Creami pint with the lid on, it keeps for up to 3 weeks in the freezer. After that, the texture starts to get icy and the flavor fades slightly. To store, press a piece of parchment paper directly onto the surface before sealing the lid — that prevents freezer burn better than anything else I’ve tried.
Q: Can I make this ahead of time or freeze it for later?
A: Absolutely. The whole point of the Creami is make-ahead convenience. You can blend and freeze the base up to 3 days before you plan to churn it — just keep the lid on tight and check that no other items in the freezer are pressing against it. For longer storage, churn it, add toppings, then freeze the finished ice cream for up to 3 weeks. To serve, let it sit on the counter for 5 minutes, then run a quick respin if needed.
Q: What’s the best way to reheat leftover ice cream?
A: Ice cream doesn’t really reheat — you want it cold and scoopable. If your pint has been in the freezer for a few days and feels too hard, let it sit on the counter for 5–7 minutes. Then pop it back into the Creami and run the Respin function for about 15 seconds. That restores the creamy texture almost like fresh-churned.
Q: What do you serve with this pistachio ice cream?
A: Three things I love: a warm brownie or blondie for a classic sundae, a sprinkle of flaky sea salt on top (it sounds weird but it makes the pistachio flavor pop), or a drizzle of honey and a few fresh berries for a lighter dessert. My personal favorite? A scoop next to a slice of olive oil cake — the fruity oil and nutty ice cream are a match made in heaven.
This is the recipe I keep coming back to because it’s genuinely simple — no tempering eggs, no cooking a custard, no churning every 30 minutes. Just blend, freeze, wait, and spin. The first time you pull that pint out and see that soft, creamy green with flecks of real nut and dark chocolate, you’ll understand why I make it so often.
If you give it a try, drop a comment below — I love hearing about other people’s favorite add-ins and variations. Tag me on Pinterest so I can see yours!
📌 This Ninja Creami pistachio ice cream recipe uses real nuts for authentic flavor — save it for your next frozen treat craving when you want something creamy, simple, and totally homemade.
Ninja Creami Pistachio Ice Cream That’s Creamy, Rich, and Ready in 24 Hours
Equipment
- Blender
- Ninja Creami pint container
- Ninja Creami outer bowl and outer lid
- Spoon
Ingredients
Ice Cream Base
- 3/4 cup shelled pistachios Roasted or raw; roasted gives a deeper, toastier flavor
- 1 cup whole milk (or Fairlife 2% milk) Whole milk gives richest base; Fairlife 2% works well
- 1/2 cup heavy cream Cold from fridge
- 1/3 cup granulated sugar Do not reduce for best texture
- 1 teaspoon vanilla extract Pure vanilla, not imitation
For Respin and Toppings
- 1 tablespoon milk or cream (for respin) Keep a splash in fridge while base freezes
- Chopped pistachios (topping) Chop coarsely for crunch
- Dark chocolate chips (topping) Mini chips distribute better
Instructions
- Blend: Add the shelled pistachios, whole milk, heavy cream, granulated sugar, and vanilla extract to your blender. Blend on high for 60–90 seconds until the mixture is completely smooth and creamy. The color will look like a muted, almost sage-y green — totally normal since there’s no artificial coloring. Don’t panic if it looks a little dull; the final color is prettier once churned.
- Freeze: Pour the blended mixture into the Ninja Creami pint container. Secure the lid tightly — I mean really click it on — and place it on a level surface in your freezer. Let it freeze for at least 24 hours until it’s completely solid. I know 24 hours feels like forever, but less time means an icy, crumbly texture every single time.
- Churn (first pass): Take the frozen pint out, remove the lid, and place it into the Ninja Creami outer bowl. Attach the outer lid, lock the assembly into the machine, and run the Ice Cream function. Let the machine complete the full cycle — it takes about 2 minutes. You’ll hear it grinding at first; that’s normal.
- Check and respin: Open the lid and look at the texture. If it looks crumbly, dry, or almost like soft snow, use a spoon to create a small hole right in the center of the ice cream — about an inch deep. Pour in 1 tablespoon of milk or cream. Reattach the lid and run the Respin function. This step is the difference between good ice cream and great ice cream. I’ve never skipped it.
- Add toppings (optional): If you want chopped pistachios or dark chocolate chips mixed in, sprinkle them on top after the respin, then use the Creami’s Mix-In function if your model has it, or just gently fold them in with a spoon. Don’t overmix — you want pockets of chocolate and crunch, not a muddy swirl.
Notes
- Don’t rush the freeze time: 24 hours is critical for proper texture.
- Your blender matters: Use a decent countertop blender for a silky-smooth base. If it struggles, soak pistachios in milk for 30 minutes before blending.
- The respin trick is not optional: Even with a perfect 24-hour freeze, the respin with 1 tablespoon of milk/cream transforms the texture.
- Let the pint temper before scooping: Let it sit on the counter for 5 minutes for easier scooping and softer texture.
- Dairy-free: Use full-fat canned coconut milk and coconut cream (flavor will be tropical-tinged).
- Lower sugar: Reduce sugar to 1/4 cup; longer temper fixes texture.
- Extra nutty: Add 2 tablespoons pistachio butter.
- Fancy guest version: Swirl in honey or salted caramel after respin.
Related posts:
 Apple Pie Rice Krispie Treats for Last-Minute Fall Desserts: 5 Minutes, No Oven, All the Flavor
 Homemade Pumpkin Marshmallow Sauce That Actually Sets Up — in 15 Minutes
 The Iced Apple Crisp Nondairy Cream Chai Latte (Starbucks Copycat) That’s Better in 5 Minutes
 Ninja Creami Salted Caramel Protein Ice Cream That’s Actually Creamy (Not Icy or Powdery)