
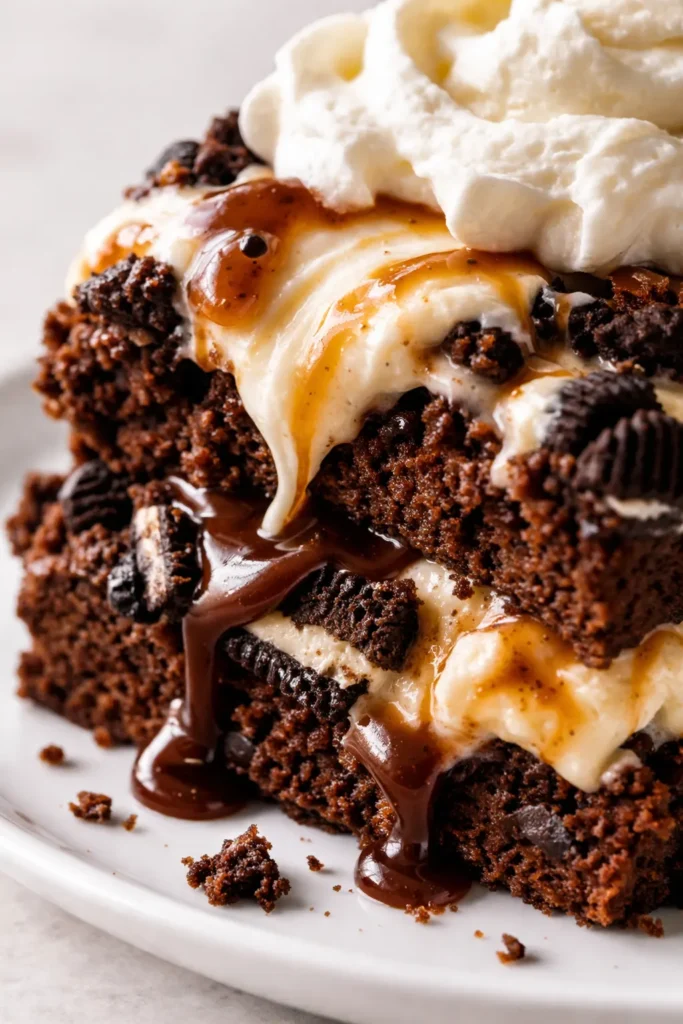
That first slice—when the knife glides through soft ice cream, hits the chewy brownie, and caramel drips down the sides—is the moment this dessert becomes legendary.
I made it for my daughter’s birthday last summer, and by the time I’d cut the second piece, three people had already texted for the recipe.
The mix of textures—fudgy brownie, creamy ice cream, crunchy Oreos, silky caramel—is the kind of thing that makes everyone ask, “Wait, you made this? It looks like it came from a bakery.”
But here’s the truth: it’s almost entirely store-bought shortcuts.
The only real cooking is the brownie base, and even that comes from a box.
What makes it special is the assembly—a few smart freezing steps and you’ve got a dessert that tastes like you spent all day in the kitchen.
I’ve been making this for years, and it’s never let me down.
Let me tell you about my first attempt.
I was so excited to layer the ice cream that I threw it on while the brownie was still barely cool.
The ice cream melted into a puddle, the Oreos got soggy, and the hot fudge seeped everywhere.
It was a delicious mess, but not a beautiful one.
Batch two I learned: freeze the brownie for a full 30 minutes before adding anything, then freeze the hot fudge layer for at least 30 minutes before the ice cream.
That extra hour of patience turned the cake into perfect, clean layers.
Now I treat those freezer pauses like non-negotiable stations—they’re the reason this cake slices like a dream.
- Serves: 12 as dessert
- Hands-On Time: 30 minutes | Total Time: 7 hours 45 minutes (includes freezing)
- Difficulty: Easy – the hardest part is waiting for it to freeze
- Cost per serving: ~$3.50
- Nutrition Estimate (per serving): 520 Calories, 8g Protein, 58g Carbs, 30g Fat, 16g Saturated Fat, 2g Fiber, 320mg Sodium
- Dietary Notes: Contains gluten, dairy, and eggs. See Variations for gluten-free option.
Photo: overhead shot of a perfect slice on a white plate, showing distinct layers: fudgy brownie with Oreo pieces, creamy light ice cream, and a drizzle of caramel sauce topped with a rosette of whipped cream. Natural afternoon light from a window to the left, with a few scattered Oreo crumbs on the plate.
Why Freezing Each Layer Separately Makes This Cake So Good
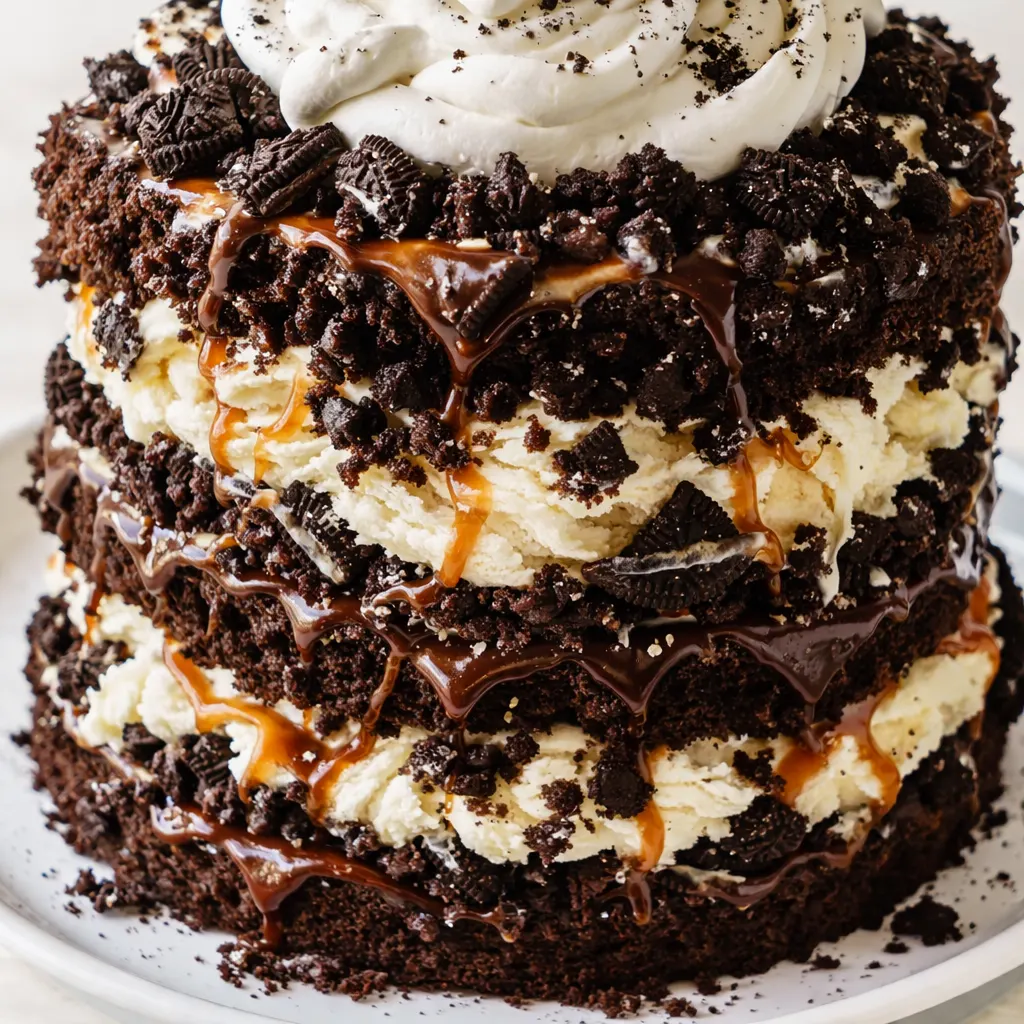
The hot fudge acts like edible glue—spreading it over a frozen brownie creates a barrier.
The Oreos get pressed into that fudge so they stay crunchy, not soggy.
If you skip that freeze, the cookies absorb moisture from the ice cream and turn soft within hours.
That’s the difference between a bakery-worthy cake and a sad, mushy one.
Bake the brownie at 350°F (as most box mixes direct) for just under the recommended time—I pull it at 20 minutes when the edges are set but the center still jiggles.
That gives you a fudgy texture that firms up beautifully in the freezer.
Overbaking gives you a dry, crumbly base that cracks when you slice.
Trust the jiggle.
And the whipped cream? Homemade is non-negotiable here.
It’s lighter and less sweet than anything from a can, and it melts into a dreamy, cloud-like layer that balances all the richness underneath.
One pint of cream, a little sugar, and vanilla—that’s it.
You’ll never go back.
Testing the Layers: What I Learned From My First Messy Attempt
That first time, I learned the hard way: warm brownie + cold ice cream = puddle.
The ice cream melted instantly, turning the Oreos into a sad paste.
The hot fudge soaked into the brownie like a sponge.
It still tasted great, but it looked like a disaster zone.
So I ran a little experiment.
I made two cakes side by side: one with the proper freezing sequence (brownie frozen 30 minutes, fudge layer frozen 30 minutes, ice cream layer frozen 6 hours) and one where I rushed the layers.
The difference was night and day.
The properly frozen cake sliced into clean, Instagram-worthy wedges.
The rushed one? A delicious, gooey landslide.
Now I treat those freezer pauses like sacred steps.
I set a timer.
I don’t cheat.
And I always tell friends: “The waiting is the hardest part, but it’s the only hard part.”
Everything You Need (And a Few Notes From Me)
- 1 box (20 ounces) brownie mix (plus ingredients called for on box—typically eggs, oil, and water): The foundation. Use your favorite brand—I go for Ghirardelli or Duncan Hines. Don’t substitute a “fudge” or “cake-like” mix—the classic chewy variety works best.
- 15 Oreos, roughly chopped: Adds crunch and a hit of chocolatey cream. Crush them into small pieces, but leave a few bigger chunks for texture. Double Stuf is fine but you’ll need to press them in a little harder.
- 13 ounces hot fudge topping (at room temperature or warmed slightly): The glue that holds everything together. Don’t use chocolate syrup—it’s too thin and will soak into the brownie. You need that thick, fudgy consistency.
- 3 quarts (12 cups) vanilla ice cream, slightly softened: The star. Let it sit at room temperature for 15–20 minutes until it’s spreadable but not melted. If it gets too soupy, pop it back in the freezer for 5 minutes. You want the texture of soft serve.
- 12 ounces salted caramel sauce (at room temperature): That sweet-salty finish. Use a good quality jarred sauce—my go-to is Trader Joe’s or Stonewall Kitchen. Or make your own if you’re feeling ambitious, but no shame in store-bought.
- 1 pint (2 cups) heavy whipping cream: For the topping. Cold cream whips up fluffier—keep it in the fridge until the last minute.
- ¼ cup powdered sugar: Sweetens the whipped cream without making it grainy.
- 1 teaspoon vanilla extract: Rounds out the flavor of the cream.
What to Pull Out Before You Start
- 9 x 13 inch baking pan
- Offset spatula (a regular butter knife works in a pinch, but the offset makes spreading so much easier)
- Stand mixer or hand mixer (for the whipped cream)
- Plastic wrap
- Large mixing bowl and a rubber spatula
Note: If you don’t have an offset spatula, a clean ruler or the back of a spoon can work for smoothing layers—just go slowly.
Let’s Make It (Step by Step)
Start by making the brownie base—it needs to be fully cool and then frozen before you start layering, so give yourself time.
I usually bake the brownie the night before.
Preheat and bake the brownie: Preheat your oven to 350°F.
Prepare the brownie mix according to the package directions (usually adding eggs, oil, and water).
Spread the batter in a greased 9×13-inch pan.
Bake for 19–22 minutes—you want the edges to look set and the center to still be slightly underdone (a toothpick inserted near the center should come out with a few moist crumbs, not raw batter).
Cool the brownies completely in the pan on a wire rack.
Then freeze the pan for 30 minutes until the brownie is firm to the touch.
- Spread the hot fudge: Once the brownie is cold and firm, spread the hot fudge topping evenly over the surface using an offset spatula. Don’t worry if it’s not perfect—it will be covered up.
- Add the Oreos: Sprinkle the chopped Oreos over the hot fudge. Use the offset spatula to press them firmly into the fudge so they stick. Smooth the top a little and then pop the pan back in the freezer for at least 30 minutes. This sets the fudge and locks in those cookies.
- Layer the ice cream: Take the softened ice cream and dollop it evenly over the cold fudge layer. Use your offset spatula to spread it gently—don’t push too hard or you’ll disturb the Oreos underneath. Smooth the top as best you can. Cover the pan with plastic wrap and freeze for at least 6 hours, preferably overnight. The longer it freezes, the cleaner your slices will be.
- Pour the caramel: Once the ice cream layer is completely firm, remove the pan from the freezer. Pour the salted caramel sauce over the top and use the offset spatula to spread it evenly. It should be thick enough that it stays put and doesn’t run off the sides. Return the cake to the freezer while you make the whipped cream.
- Whip the cream: In a stand mixer or with a hand mixer, beat the heavy whipping cream, powdered sugar, and vanilla extract together. Start on low speed to avoid splashes, then increase to medium-high. Beat until stiff peaks form—the cream should hold its shape when you lift the whisk. Don’t overbeat or it will turn grainy, then eventually into butter.
- Top and freeze again: Spread the whipped cream over the caramel layer. Use the offset spatula to create swirls or a smooth finish—your choice. Cover loosely with plastic wrap and freeze for at least 1 more hour to set the cream, or until you’re ready to serve. The cake can stay frozen for up to a week.
When you’re ready to slice, let the cake sit at room temperature for about 10 minutes—this softens the ice cream just enough for a clean cut.
Use a large, sharp knife dipped in warm water between slices for the neatest pieces.
How I Meal Prep This for the Week
This cake is my go-to for summer potlucks because I can assemble the whole thing over two days.
I bake the brownie on a Thursday night, let it cool, and freeze it.
Friday afternoon I layer the fudge, Oreos, and ice cream, then freeze overnight.
Saturday morning I add the caramel and whipped cream, and it’s ready by lunchtime.
It’s the kind of recipe that makes you feel like a hero with almost no day-of effort.
- Fridge: Not recommended—the ice cream will melt and the cake will get soggy. Keep it frozen at all times.
- Freezer: Yes—cover tightly with plastic wrap and then foil. It keeps for up to 2 weeks. After that, the ice cream can develop ice crystals, but the flavor is still fine.
- Reheat: You don’t actually reheat this cake—just let it sit at room temperature for 5–10 minutes before slicing. That’s all the “warmth” it needs.
My Honest Advice After Making This Too Many Times to Count
- Don’t rush the softening of the ice cream: If you try to spread ice cream that’s still rock-hard, you’ll crack the fudge layer and disturb the Oreos. Let it sit out for 15–20 minutes. If you over-soften (it starts to look soupy), pop it back in the freezer for 5 minutes and stir it with a fork. You want the texture of a thick milkshake—spreadable but not runny.
- Use a warm offset spatula for the ice cream layer: Run your spatula under hot water for 10 seconds, dry it off, then use it to smooth the ice cream. The gentle heat glides through the cold surface without sticking. Re-warm the spatula between passes. This is the trick that gives you that perfectly smooth, even ice cream layer.
- Press the Oreos firmly into the fudge: I use the flat side of the offset spatula and apply gentle pressure until the pieces are visibly embedded in the fudge. If you just sprinkle them on, they’ll float off when you add the ice cream and end up in a pile at one edge. You want them distributed evenly across the whole cake.
- Let the cake sit out exactly 10 minutes before serving: Any shorter and the knife will struggle; any longer and the ice cream starts to soften too much and the layers can slide. Set a timer—10 minutes is the sweet spot. Even if you mess this up a little, it’ll still taste incredible. I’ve served it straight from the freezer with a hot knife and it was messy but delicious.
Swaps That Actually Work
- Gluten-Free: Use a gluten-free brownie mix and gluten-free sandwich cookies (like Glutino or Goodie Girl). Everything else is naturally gluten-free. The texture of the cake will be slightly more delicate, but the flavor is just as good.
- Different ice cream flavors: Vanilla is classic, but chocolate, cookies and cream, or even strawberry all work beautifully. Mint chocolate chip is a fun holiday version—use a dark chocolate brownie for contrast.
- Skip the Oreos: If you’re not a fan, replace them with crushed toffee bits, crumbled shortbread cookies, or chopped chocolate chips. You still want something crunchy for texture.
- Make it dairy-free: Use a dairy-free brownie mix (check the box), coconut milk-based ice cream (like So Delicious or NadaMoo), and dairy-free whipped topping (like CocoWhip). The caramel sauce might contain dairy—look for a vegan version. The texture will be a bit softer, so freeze the final cake for at least 8 hours.
Troubleshooting: Why Did My Ice Cream Layer Melt Into the Brownie?
Q: Why did my ice cream melt into the brownie instead of staying separate?
A: The most common culprit is that the brownie and fudge layers weren’t fully frozen before you added the ice cream.
The brownie needs at least 30 minutes in the freezer after cooling, and the fudge layer needs another 30 minutes after you spread it.
If the brownie is even slightly warm, it will heat the fudge, which heats the ice cream, and suddenly you have a muddy mess.
Next time, make sure each layer is completely firm to the touch before moving on.
I’ve been there—it still tastes good, but it’s not as pretty.
Q: Can I use chocolate syrup instead of hot fudge?
A: I wouldn’t.
Chocolate syrup is too thin and watery—it will soak into the brownie and make it soggy rather than forming a distinct layer.
Hot fudge is thick and holds its place.
If you’re in a pinch, you can melt some chocolate chips with a little coconut oil to make your own thick fudge sauce.
Let it cool to room temperature before spreading.
Q: How do I know when the ice cream layer is set enough for the caramel?
A: It should feel solid when you press on it gently with a finger.
No squishiness.
Usually after 6 hours in the freezer, but overnight is safest.
If you’re unsure, stick a butter knife into the center—it should meet resistance and come out clean.
Q: Can I make this vegan?
A: Yes, with some tweaks.
Use a vegan brownie mix (most are), vegan sandwich cookies, coconut milk-based ice cream, dairy-free caramel, and coconut cream whipped topping.
The texture will be slightly softer, but the flavor and fun factor are identical.
Freeze for at least 8 hours and let it sit out 5 minutes before slicing.
How Do You Store Brownie Ice Cream Cake?
Q: How long does the finished cake last, and how should I store it?
A: It keeps beautifully in the freezer for up to 2 weeks.
Wrap the pan tightly with plastic wrap, then a layer of foil to prevent freezer burn.
If you only have a slice left, transfer it to an airtight container.
The whipped cream may start to deflate after about a week, but it will still taste fine.
Q: Can I make this cake ahead of time? Can I freeze it?
A: Absolutely.
You can assemble the entire cake (all layers including whipped cream) and freeze it for up to 2 weeks before serving.
Just wrap it well.
I often make two cakes at once—one to serve now and one to keep in the freezer for unexpected guests.
It’s the ultimate party secret.
Q: What’s the best way to reheat leftover slices?
A: You don’t actually reheat this cake.
If you want a slightly softer ice cream texture, let the slice sit at room temperature for 5–10 minutes.
If you want it really soft, you can microwave a slice for 10–15 seconds, but the whipped cream will deflate.
Honestly, I prefer it straight from the freezer—the contrast between cold ice cream and fudgy brownie is the whole point.
Q: What do you serve with this cake?
A: It’s pretty complete on its own, but I love a fresh element.
Sliced strawberries or raspberries are perfect—their tartness cuts through the richness.
A drizzle of extra caramel or a sprinkle of flaky sea salt also works.
For an over-the-top dessert night, add a warm brownie on the side (yes, even more brownie).
And obviously, a tall glass of milk.
My kids always ask for a scoop of extra whipped cream on top of their slice—I never say no.
This brownie ice cream cake has become my most-requested recipe for every birthday, barbecue, and holiday gathering.
It’s the kind of dessert that looks like you fussed, but really it’s just a few smart shortcuts and a little patience.
I hope it becomes a tradition in your home too.
If you make it, drop a comment below—I love hearing how it goes, or any silly stories about your first messy attempt (we all have them!).
Tag me on Pinterest so I can see your beautiful layers!
📌 This brownie ice cream cake recipe is the easiest showstopper for summer parties—save it for your next birthday celebration or weekend cookout.
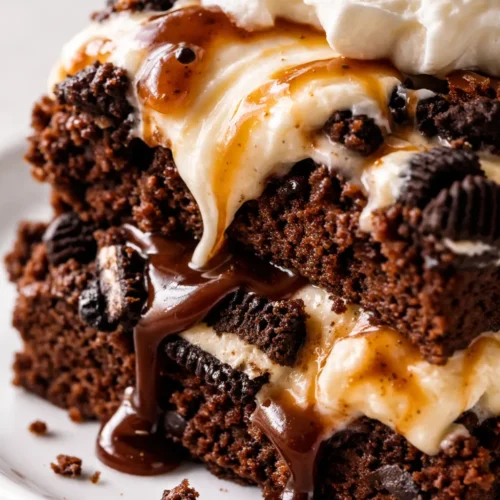
Brownie Ice Cream Cake for Summer Celebrations: No-Bake, Layered, and Completely Irresistible
Equipment
- 9×13-inch baking pan
- Offset spatula
- Stand mixer or hand mixer
- Plastic wrap
- Large Mixing Bowl
- Rubber spatula
- Wire rack
Ingredients
For the Cake
- 1 box (20 oz) brownie mix plus eggs, oil, water as per package directions
- 15 cookies chocolate sandwich cookies (Oreos) roughly chopped
- 13 oz hot fudge topping at room temperature or warmed slightly
- 3 quarts vanilla ice cream slightly softened
- 12 oz salted caramel sauce at room temperature
- 1 pint heavy whipping cream
- ¼ cup powdered sugar
- 1 teaspoon vanilla extract
Instructions
- Preheat your oven to 350°F. Prepare the brownie mix according to the package directions (usually adding eggs, oil, and water). Spread the batter in a greased 9×13-inch pan. Bake for 19–22 minutes—you want the edges to look set and the center to still be slightly underdone (a toothpick inserted near the center should come out with a few moist crumbs, not raw batter). Cool the brownies completely in the pan on a wire rack. Then freeze the pan for 30 minutes until the brownie is firm to the touch.
- Spread the hot fudge: Once the brownie is cold and firm, spread the hot fudge topping evenly over the surface using an offset spatula.
- Add the Oreos: Sprinkle the chopped Oreos over the hot fudge. Use the offset spatula to press them firmly into the fudge so they stick. Smooth the top a little and then pop the pan back in the freezer for at least 30 minutes.
- Layer the ice cream: Take the softened ice cream and dollop it evenly over the cold fudge layer. Use your offset spatula to spread it gently—don’t push too hard or you’ll disturb the Oreos underneath. Smooth the top as best you can. Cover the pan with plastic wrap and freeze for at least 6 hours, preferably overnight.
- Pour the caramel: Once the ice cream layer is completely firm, remove the pan from the freezer. Pour the salted caramel sauce over the top and use the offset spatula to spread it evenly. Return the cake to the freezer while you make the whipped cream.
- Whip the cream: In a stand mixer or with a hand mixer, beat the heavy whipping cream, powdered sugar, and vanilla extract together. Start on low speed to avoid splashes, then increase to medium-high. Beat until stiff peaks form.
- Top and freeze again: Spread the whipped cream over the caramel layer. Use the offset spatula to create swirls or a smooth finish. Cover loosely with plastic wrap and freeze for at least 1 more hour to set the cream, or until you’re ready to serve.
- When you’re ready to slice, let the cake sit at room temperature for about 10 minutes—this softens the ice cream just enough for a clean cut. Use a large, sharp knife dipped in warm water between slices for the neatest pieces.
Notes
Related posts:
 My Lavender Blueberry Tea Cakes with the Tender Crumb That Tastes Like Spring Morning
 Pumpkin Cream Cheese Swirl Muffins That Don’t Sink in the Middle — Finally
 My Strawberry Tres Leches Cake Is Bakery-Worthy but Starts With a Box Mix (Nobody Knows)
 The Classic Icebox Cake You’d Never Believe Is So Simple (But Everyone Asks for the Recipe)