
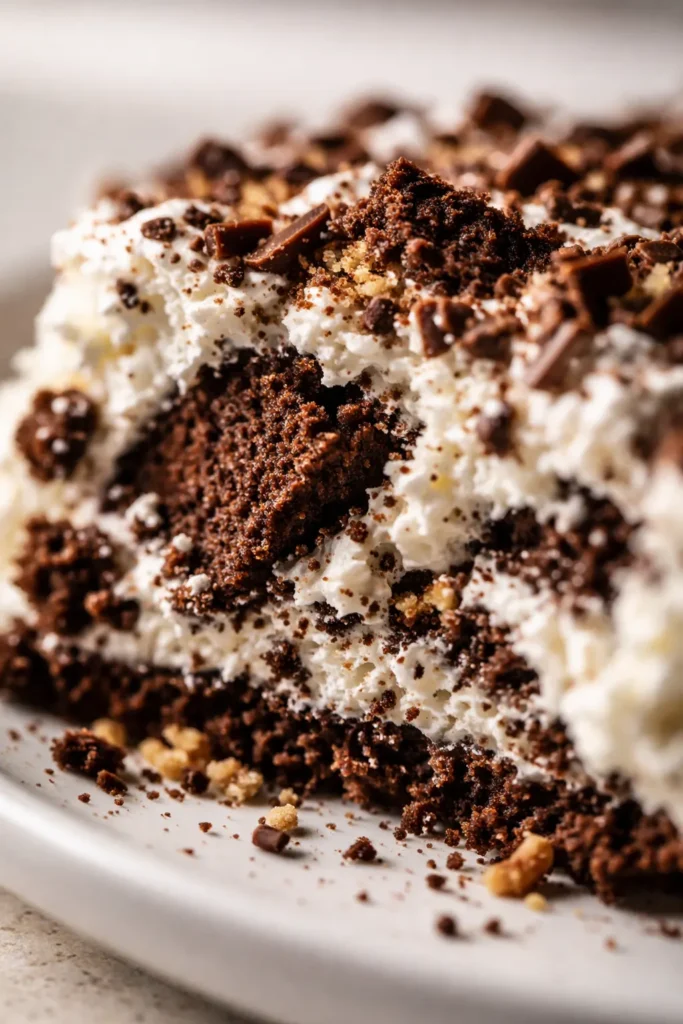
The magic of an icebox cake is all about controlled moisture migration. As the assembled cake chills, the dry chocolate wafers pull moisture from the sweetened whipped cream. Over those crucial hours in the refrigerator, the cookies soften into a tender, almost fudge-like cake texture. Most bakers agree that 8 hours is the minimum for a sliceable result, but I’ve found 12 hours produces an even more luxurious, cohesive texture. The whipped cream, supported by the cookies, stabilizes and firms up, creating a structure that holds its shape beautifully when sliced. This isn’t just a no-bake shortcut — it’s a clever application of basic ingredient chemistry that home cooks have been using since the 1960s. A slice of this provides roughly 10% of your daily recommended intake of calcium, based on USDA nutritional data, from the generous amount of high-quality heavy cream.
Ingredients Worth Talking About (Plus My Honest Notes)
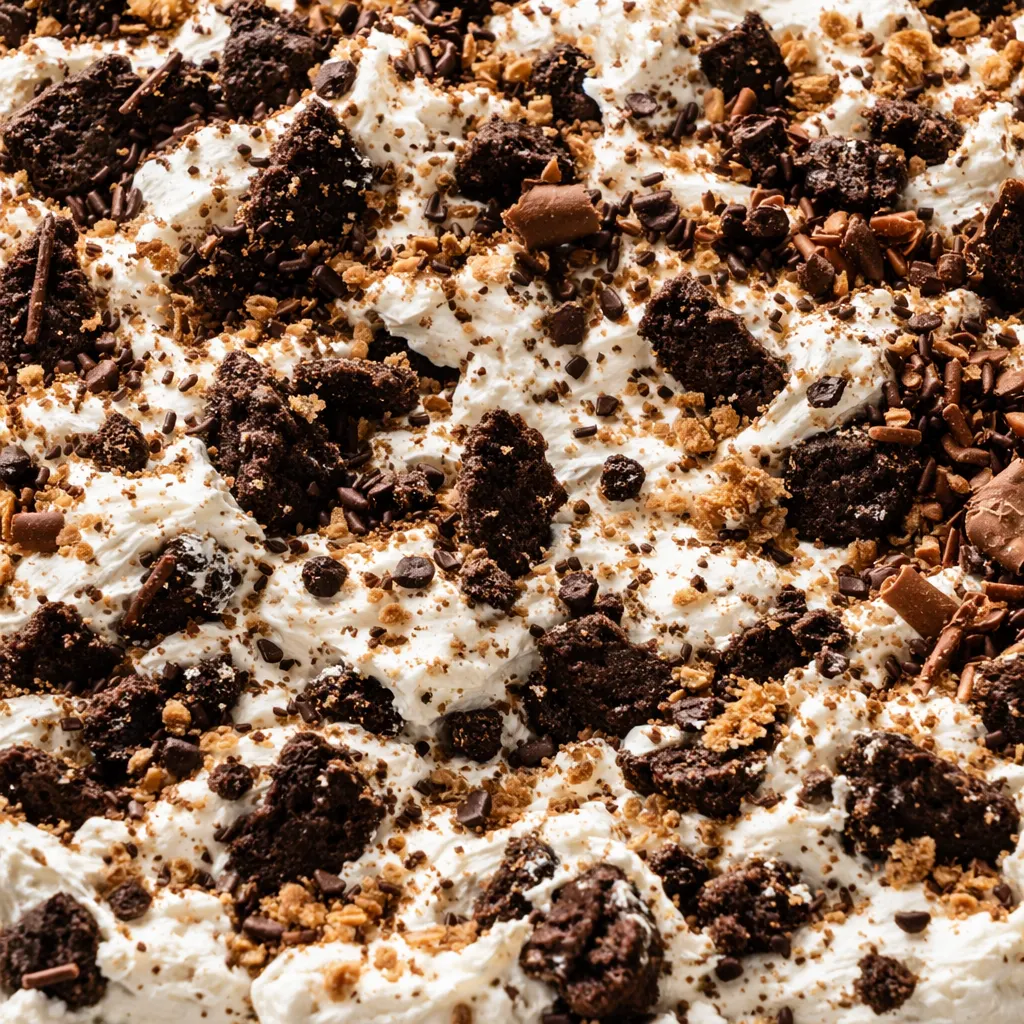
- 3 ½ cups very cold heavy whipping cream: This is the entire structure of your cake. It needs to be very cold (below 40°F / 4°C) to whip up to stiff, stable peaks. Cream with at least 36% milkfat holds its shape best and won’t deflate under the weight of the cookies.
- ½ cup powdered sugar (confectioners’ sugar): Granulated sugar is too heavy and gritty for raw cream. Powdered sugar dissolves instantly, giving you a silky-smooth, light sweetness without any graininess.
- 1 teaspoon vanilla extract: Pure vanilla is non-negotiable here. It provides a warm, aromatic backdrop that makes the chocolate flavor sing. Imitation vanilla can leave a harsh, chemical aftertaste in a raw application like this.
- ¼ teaspoon salt: Don’t skip it. A quarter teaspoon of salt doesn’t make the dessert salty — it balances the sweetness of the sugar and the bitterness of the chocolate, making every flavor pop.
- 9 ounces chocolate wafer cookies (about 29 wafers): This is the classic ingredient. Nabisco Famous Chocolate Wafers are the gold standard — they’re thin, crisp, and have a deep, slightly bitter cocoa flavor that perfectly contrasts the sweet cream.
- 40 chocolate graham crackers (alternate): A sweeter, slightly honey-tinged alternative with a sturdier crunch. If you’re using graham crackers, expect a slightly more rustic, sweet crumb once softened.
- Optional garnishes: Chocolate sprinkles, crushed chocolate wafer cookies, crushed graham cracker crumbs, or shaved chocolate curls. I almost always add the curls — they make it look like you spent hours on it.
What to Pull Out Before You Start
- Large bowl: Metal or glass is best. I pop mine in the freezer for about 10 minutes before I start — the cold bowl makes a huge difference in how quickly the cream whips up.
- Electric mixer: Hand mixer or stand mixer with the whisk attachment. You can absolutely whip the cream by hand with a balloon whisk, but your arm will be tired and it’ll take about 10-12 minutes of solid effort.
- 9×5 inch loaf pan: This is the perfect size for a classic icebox cake. You want something tall and narrow so the layers stack up beautifully.
- Rubber spatula: For scraping every last bit of cream out of the bowl.
- Plastic wrap: To cover the pan tightly while it chills.
Let’s Make an Icebox Cake (It’s Almost Embarrassingly Easy)
I promise you, this is one of those recipes where the hardest part is waiting for it to set. The actual hands-on time is maybe 20 minutes.
Chill and Whip: Place your large mixing bowl and the beaters from your electric mixer in the freezer for 10 minutes. In the chilled bowl, combine the 3 ½ cups very cold heavy cream, ½ cup powdered sugar, 1 teaspoon vanilla extract, and ¼ teaspoon salt. Beat on medium speed until soft peaks form, then increase to medium-high speed and beat until stiff peaks form. This takes about 3-5 minutes total. You’ll know it’s ready when you lift the beaters and the cream holds a peak that stands straight up and doesn’t flop over. Be careful not to overbeat — if it starts to look grainy or curdled, you’ve gone too far and the cream will separate.
Layer the Wafers: Spread a tiny dollop of cream on the bottom of your loaf pan (this acts as glue so the first layer doesn’t slide around). Arrange a single layer of chocolate wafer cookies on the bottom. You’ll likely need to break a few wafers in half to fit snugly — don’t leave big gaps. Spread about ½ cup of whipped cream evenly over the cookies. Repeat this process: cookies, cream, cookies, cream. You should get about 6 to 7 layers total, depending on your pan. Finish with a final, generous layer of cream on top. Smooth it out with your spatula.
Alternate Chocolate Graham Cracker Instructions: Follow the exact same layering process. Because graham crackers are typically larger and thicker, you might get slightly fewer layers (around 5 to 6). The final texture will be a little sweeter and slightly more honey-flavored. Both versions are delicious — the wafer version is more classic and sophisticated, while the graham cracker version feels a bit more like a nostalgic childhood treat.
Chill: Cover the pan tightly with plastic wrap, pressing it directly onto the surface of the top cream layer (this prevents a skin from forming). Refrigerate for at least 8 hours. Overnight is best. Don’t rush this step — the texture transformation is what makes the recipe work.
Serve: To serve, you can either slice it directly from the loaf pan or carefully invert it onto a serving plate. If inverting, run a thin knife around the edges first, place a plate on top, and flip. The cake should release cleanly. Garnish with chocolate curls, crushed cookies, or sprinkles before slicing.
How I Prep This No-Bake Dessert for a Stress-Free Weekend
This is the ultimate make-ahead dessert. I often assemble it on a Thursday night for a Saturday dinner party. The texture only gets better. If I’m bringing it to a potluck, I assemble it in a disposable loaf pan, chill it overnight, and transport it in a small cooler with an ice pack.
- Fridge: The assembled and chilled cake can sit in the refrigerator for up to 2-3 days. The texture will become progressively more fudge-like and dense the longer it sits, which most people love.
- Freezer: Yes, it freezes beautifully! Wrap the fully chilled cake (in the pan) very tightly in a layer of plastic wrap, then a layer of aluminum foil. Freeze for up to 1 month. Thaw in the refrigerator overnight before serving.
- Reheat: None needed. Serve it cold directly from the fridge. If it’s been frozen, let it sit in the fridge for a few hours to soften slightly for the best texture.
Testing the Icebox Cake: My Hard-Earned Lessons
- Don’t overwhip the cream: I know I said it already, but it’s the most common mistake. The cream should be smooth, glossy, and hold a stiff peak. If you overbeat it, it will turn grainy, separate, and eventually start to look like butter. If you see it seizing up, stop immediately. You can sometimes salvage it by folding in a tablespoon of cold cream by hand.
- Use a serrated knife for slicing: A regular chef’s knife can squish the layers together. A serrated knife (or even unscented dental floss) will give you a clean, beautiful cross-section. Wipe the blade clean between cuts for the best presentation.
- Let it sit at room temperature for 5 minutes: Right out of the fridge, the cream is very firm. Letting it sit on the counter for 5 minutes before slicing allows it to soften to a perfect, luxurious texture. It makes a big difference.
- Crush the cookies for the middle layers: For a slightly easier layering process, you can crush the cookies for the middle layers into coarse crumbs and sprinkle them over the cream. This is a great shortcut and creates a slightly different, but equally delicious, texture.
Swaps That Actually Work (For Every Diet and Craving)
- Gluten-Free: Use high-quality gluten-free chocolate wafer cookies or gluten-free chocolate graham crackers. The texture will be slightly more delicate, but the dessert works perfectly. I’ve done this for friends with celiac disease and they were thrilled.
- Dairy-Free: Use chilled full-fat coconut cream (the solid part from a can of full-fat coconut milk) or a high-quality dairy-free whipping cream like CocoWhip. The flavor changes slightly to coconut, but the texture remains wonderfully creamy.
- Berry Version: Add a layer of fresh, sliced strawberries or raspberries between the cookies and cream. The acidity of the berries cuts through the richness and adds a beautiful color.
- Mint Chocolate: Swap the vanilla extract for ½ teaspoon of peppermint extract in the cream. Use thin mint cookies (like Girl Scout Thin Mints) instead of the classic wafers. It’s a showstopper.
- Peanut Butter Dream: Swirl ½ cup of smooth peanut butter (warmed slightly to loosen it) into the finished whipped cream before layering. The salty peanut butter with the sweet cream and chocolate is incredible.
Troubleshooting: Common Icebox Cake Problems and Fixes
Why did my icebox cake turn out soupy and not sliceable?
A: This is almost always a chilling time issue. The cookies need at least 8 hours to fully absorb the moisture from the cream. If you only chilled it for 3-4 hours, the cream is still too soft and the cookies haven’t softened enough to create the structure. Patience is key. I’ve been there — it’s tempting to cut into it early, but it’s worth the wait.
Can I use Cool Whip or a tub of whipped topping instead of homemade whipped cream?
A: Yes, you can, but the texture is noticeably different. Cool Whip is denser, sweeter, and contains stabilizers that make it hold its shape very well. It works, but it won’t have the light, airy, cloud-like quality of freshly whipped heavy cream. If you use it, you might need a little less sugar overall, as it’s already sweetened.
Why did my whipped cream deflate while I was layering the icebox cake?
A: Either the cream wasn’t cold enough when you started, or there was a trace of fat (like butter) or soap residue on your bowl or beaters. Fat inhibits the whipping process. Always make sure your equipment is impeccably clean and very cold for the best results.
Can I make this with gluten-free cookies?
A: Absolutely. Look for gluten-free chocolate wafer cookies or gluten-free chocolate graham crackers. The texture might be slightly softer and more crumbly than the original, but the flavor will be just as wonderful. I’ve tested this with a popular GF brand and it was a hit.
Can I Make This Icebox Cake Ahead of Time?
How long does icebox cake last in the fridge?
A: It can last in the fridge for up to 3-4 days. The texture will change over time — it will become more tender, fudge-like, and dense the longer it sits. By day 3, it’s almost like a chocolate mousse cake. It’s still delicious, just different.
Can you freeze icebox cake?
A: Yes! I do this all the time. Assemble the cake, let it chill for the full 8 hours, then wrap the entire pan very tightly in plastic wrap and foil. Freeze for up to a month. To serve, thaw it in the refrigerator overnight. The texture after freezing is still excellent.
What’s the best way to slice an icebox cake cleanly?
A: Use a thin, sharp serrated knife. Dip the knife in hot water, wipe it dry, then make your slice. Wipe the blade clean and re-dip in hot water between each slice for perfectly clean edges.
What do you serve with an icebox cake?
A: It’s so rich that it doesn’t need much. I love serving it with a dollop of extra whipped cream, a handful of fresh raspberries or sliced strawberries, or a drizzle of warm fudge sauce. For a special occasion, a side of coffee or espresso is a perfect pairing.
I love this recipe because it’s the kind of thing you can throw together after a big dinner with zero planning, and it feels completely special without any real effort. It’s old-fashioned in the best way — proof that you don’t need fancy equipment or complicated steps to make something unforgettable.
If you try it, drop a comment below or tag me on Pinterest — I genuinely love hearing how it goes for you and seeing your beautiful slices!
📌 The classic no-bake icebox cake recipe that uses simple ingredients and no oven time — save it for your next make-ahead summer dessert or holiday gathering!
The Classic Icebox Cake You’d Never Believe Is So Simple (But Everyone Asks for the Recipe)
Equipment
- Large Bowl
- Electric Mixer
- 9×5-inch Loaf Pan
- Rubber spatula
- Plastic wrap
Ingredients
Main Ingredients
- 3.5 cups heavy whipping cream very cold
- 0.5 cup powdered sugar
- 1 teaspoon vanilla extract
- 0.25 teaspoon salt
- 9 ounces chocolate wafer cookies about 29 wafers
Optional Garnishes
- chocolate sprinkles
- crushed chocolate wafer cookies
- crushed graham cracker crumbs
- shaved chocolate curls
Instructions
- Place your large mixing bowl and the beaters from your electric mixer in the freezer for 10 minutes. In the chilled bowl, combine the 3 ½ cups very cold heavy cream, ½ cup powdered sugar, 1 teaspoon vanilla extract, and ¼ teaspoon salt. Beat on medium speed until soft peaks form, then increase to medium-high speed and beat until stiff peaks form. This takes about 3-5 minutes total. You’ll know it’s ready when you lift the beaters and the cream holds a peak that stands straight up and doesn’t flop over. Be careful not to overbeat — if it starts to look grainy or curdled, you’ve gone too far and the cream will separate.
- Spread a tiny dollop of cream on the bottom of your loaf pan (this acts as glue so the first layer doesn’t slide around). Arrange a single layer of chocolate wafer cookies on the bottom. You’ll likely need to break a few wafers in half to fit snugly — don’t leave big gaps. Spread about ½ cup of whipped cream evenly over the cookies. Repeat this process: cookies, cream, cookies, cream. You should get about 6 to 7 layers total, depending on your pan. Finish with a final, generous layer of cream on top. Smooth it out with your spatula.
- Cover the pan tightly with plastic wrap, pressing it directly onto the surface of the top cream layer (this prevents a skin from forming). Refrigerate for at least 8 hours. Overnight is best. Don’t rush this step — the texture transformation is what makes the recipe work.
- To serve, you can either slice it directly from the loaf pan or carefully invert it onto a serving plate. If inverting, run a thin knife around the edges first, place a plate on top, and flip. The cake should release cleanly. Garnish with chocolate curls, crushed cookies, or sprinkles before slicing.
Related posts:
 My Lavender Blueberry Tea Cakes with the Tender Crumb That Tastes Like Spring Morning
 Pumpkin Cream Cheese Swirl Muffins That Don’t Sink in the Middle — Finally
 My Strawberry Tres Leches Cake Is Bakery-Worthy but Starts With a Box Mix (Nobody Knows)
 Pineapple Upside Down Cake That’s Perfectly Caramelized in Under an Hour