
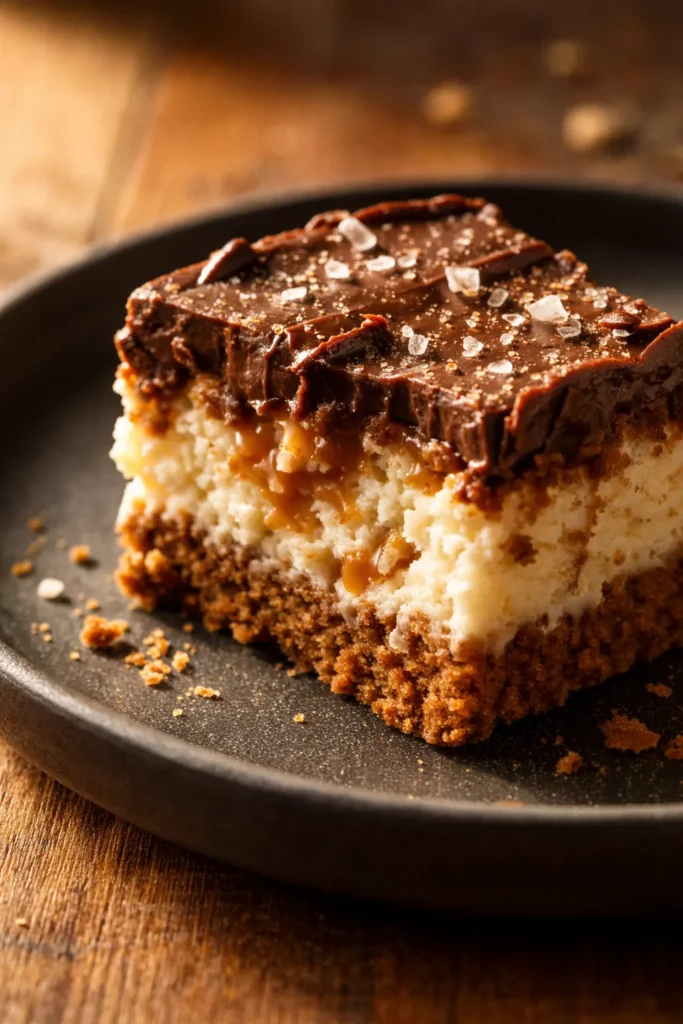
TLDR: These no-bake chocolate caramel cheesecake bites layer a buttery graham cracker crust with a light cream cheese filling, topped with caramel, dipped in chocolate, and finished with sea salt. Chill for 2 hours before dipping — the filling needs that time to set firm enough for a clean chocolate coating. Expect a creamy, crunchy, salty-sweet bite that looks bakery-made but comes together in about 30 minutes of hands-on work.
The first time you pull one of these out of the mold — that clean edge, the crack of chocolate as you bite through, the way the caramel and sea salt hit right after the creamy cheesecake — you’ll text a photo to someone before you’ve even finished chewing. I made these for a Friendsgiving last fall and watched three people hover near the platter for a solid hour. One friend asked for the recipe before she’d even swallowed. That’s the kind of bite these are.
The first batch I made looked great coming out of the fridge, but when I dipped them in chocolate, the filling was still a little too soft and the tops caved in. I’d only chilled them about 45 minutes and thought it was enough — it wasn’t. Batch two got the full 2 hours in the fridge, and the difference was night and day. The filling held its shape perfectly, the chocolate set smooth and even, and that first bite had the clean snap I’d been chasing. Now I set a timer and walk away. No shortcuts on that chill time.
- Serves: 24 bites as a dessert or party appetizer
- Hands-On Time: 30 min | Total Time: 3 hours (includes 2 hours chilling + 30 min for chocolate to set)
- Difficulty: Medium — multiple steps but each one is simple; just need patience with the chilling
- Cost per serving: ~$0.75 per bite
- Nutrition Estimate: 165 Calories, 2g Protein, 16g Carbs, 11g Fat, 6g Saturated Fat, 1g Fiber, 95mg Sodium per bite
- Dietary Notes: Vegetarian. Can be adapted gluten-free with certified GF graham crackers.
(Photo above: overhead shot of two finished cheesecake bites on a small white plate, one cut in half to reveal the layered graham cracker crust and creamy filling, chocolate coating shiny and smooth, a few flakes of sea salt catching the light from a window on the left.)
Why Chilling Is Non-Negotiable for No-Bake Chocolate Caramel Cheesecake Bites
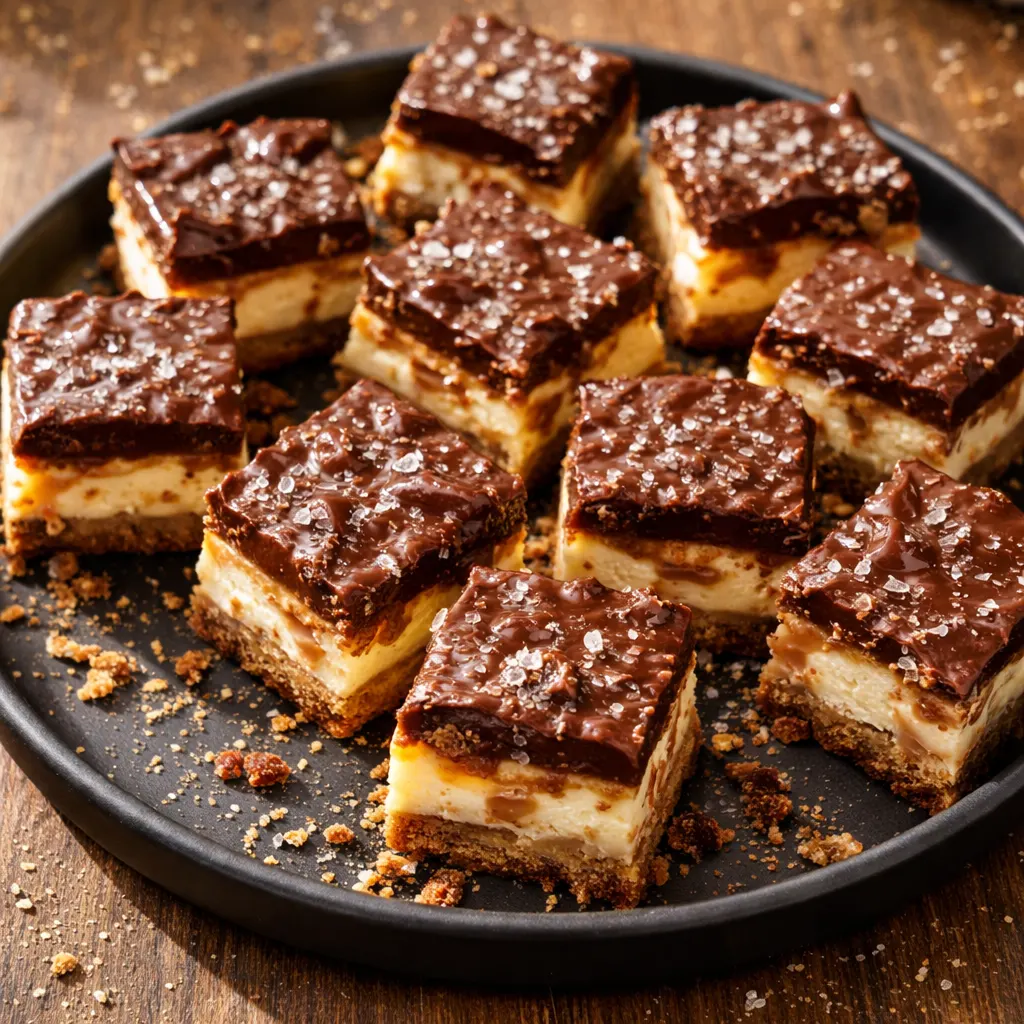
The cream cheese and whipped cream filling is light and airy right after you fold it together — that’s exactly what you want for texture. But if you skip the full 2-hour chill, the filling won’t be firm enough to hold up to the warm melted chocolate. Room-temperature filling + warm chocolate = a melted mess. Most home bakers find that 2 hours is the sweet spot: the filling sets enough to keep its shape while still staying creamy on the inside.
The graham cracker base needs that chill time too. Pressing the crumbs in tightly and giving them time to firm up means the crust won’t crumble apart when you bite into it. I press mine in with the back of a teaspoon and really pack it down — that one step makes the difference between a crust that holds together and one that falls apart on the plate.
What you get after the full chill and the chocolate dip is a bite that’s firm enough to hold in your hand, with a little give when you press it, and a chocolate shell that cracks open to reveal that creamy, caramel-swirled center. It’s the kind of texture combination that makes people close their eyes when they eat it.
Everything You Need (And a Few Notes From Me)
- 1 cup graham cracker crumbs: This is the base of the crust. You can buy pre-crushed crumbs or crush whole graham crackers in a zip-top bag with a rolling pin — I do the bag method when I forget to buy the pre-crushed kind. Crush them finely; big chunks make the crust crumbly and hard to press into the molds.
- 2 tablespoons melted butter: Binds the crumbs together. Unsalted is best so you control the salt level, but salted works fine — just skip the extra salt garnish if you use it. Melt it in the microwave in 15-second bursts so it doesn’t splatter everywhere.
- 2 tablespoons granulated sugar: A little extra sweetness for the crust. The graham crackers are already sweet, but this helps the crust taste like a real dessert base. You could use brown sugar here for a deeper flavor, but white sugar keeps the crust neutral against the caramel and chocolate.
- 8 oz softened cream cheese: The heart of the filling. It must be fully softened to room temperature — cold cream cheese will leave lumps that no amount of beating will fix. Take it out of the fridge 45 minutes before you start. If you forget, cut it into small cubes and let them sit for 15 minutes on the counter.
- 1/2 cup granulated sugar: Sweetens and stabilizes the cream cheese filling. It dissolves into the cream cheese as you beat it. Beat it until you can’t feel any grit when you rub a little between your fingers.
- 1 teaspoon vanilla extract: Rounds out the flavor. Pure vanilla is better here since there aren’t many ingredients to hide behind. I use pure vanilla extract, but imitation will work — just use a little less since it’s stronger.
- 1 cup whipped cream: This is what makes the filling light and mousse-like instead of dense and heavy. Use stabilized whipped cream (with a little powdered sugar) or store-bought whipped topping. Fold it in gently — stir too hard and you’ll deflate all that airy texture.
- Caramel sauce (no quantity given — use generously): The sweet, gooey layer between the cheesecake and the chocolate. Use a thick caramel sauce that won’t run off the top. Homemade or store-bought both work — just avoid the super-thin ice cream topping kind.
- 1 cup chocolate chips: For the coating. Semi-sweet or dark chocolate balances the sweetness of the caramel and filling. Use good-quality chips — the cheap ones don’t melt as smoothly and can seize up in the microwave.
- Sea salt (to garnish): Flaky sea salt is the finishing touch that makes the sweet-salty combo sing. Maldon or any flaky salt — don’t use fine table salt or it’ll just dissolve and disappear.
What to Pull Out Before You Start
- Medium bowl: For mixing the graham cracker crust. A standard cereal bowl works fine.
- Large mixing bowl: For beating the cream cheese filling. You need room to beat without splashing.
- Mini muffin tins or silicone molds: Mini muffin tins (about 24 cavities) or small silicone molds in any shape. Silicone is easier for popping the finished bites out, but greased metal tins work too.
- Spatula: For folding the whipped cream into the cream cheese and for smoothing the tops.
- Microwave-safe bowl: For melting the chocolate chips. A glass measuring cup works great because the spout makes dipping easier.
- Refrigerator: You’ll need space for the muffin tins to sit flat for at least 2 hours.
Let’s Make It (Step by Step)
I like to set all my ingredients on the counter before I start — makes the whole process feel smoother. Let’s go.
Start with the crust:
- Combine the crust: In a medium bowl, stir together 1 cup graham cracker crumbs, 2 tablespoons melted butter, and 2 tablespoons granulated sugar. Mix until every crumb looks damp and evenly coated — if you see dry spots, stir more. You want it to look like wet sand that holds together when you squeeze it.
- Press and chill: Press the crumb mixture firmly into the bottom of each mini muffin cavity or silicone mold. Pack it down tight — use the back of a small spoon or your thumb. Place the tins in the refrigerator to set while you make the filling. Really pack it in. A loose crust will fall apart when you try to eat it.
- Beat the cream cheese: In a large mixing bowl, beat 8 oz of softened cream cheese until it’s completely smooth with no lumps — about 1 minute with a hand mixer or 2 minutes by hand with a wooden spoon. Scrape the sides and bottom of the bowl at least once.
- Add sugar and vanilla: Gradually add 1/2 cup granulated sugar and 1 teaspoon vanilla extract, beating until well combined and the sugar is fully dissolved. Rub a tiny bit between your fingers — if it feels gritty, keep beating. This takes about 2 minutes with a hand mixer.
- Fold in whipped cream: Gently fold in 1 cup of whipped cream using a spatula. Start from the bottom and bring the mixture up and over, turning the bowl as you go. Stop as soon as you don’t see white streaks — over-mixing will make it dense. Be really gentle here. You want the filling to stay light and airy.
- Fill the molds: Spoon the cheesecake filling on top of the prepared graham cracker bases, filling each cavity to the top. Use the spatula to smooth the surface flat. A tiny offset spatula is perfect here, but the back of a spoon works too.
- Drizzle caramel: Drizzle caramel sauce generously over each cheesecake bite — a teaspoon or so per bite, depending on how much you love caramel. Swirl it gently with a toothpick if you want it to look fancy. I go heavy on the caramel because it sinks in slightly and creates a gooey layer under the chocolate.
- Chill for 2 hours: Refrigerate the bites for at least 2 hours, or until the filling is firm to the touch. Don’t rush this step — the filling needs to be fully set before you dip it in chocolate. I set a timer on my phone so I don’t forget.
- Melt and dip: Just before serving, melt 1 cup of chocolate chips in a microwave-safe bowl in 30-second intervals, stirring each time, until smooth. Dip the top of each chilled cheesecake bite into the melted chocolate, letting any excess drip off. Place them back on a parchment-lined tray. If the chocolate gets too thick, microwave it for 10 seconds to thin it out.
- Set the chocolate: Return the dipped bites to the fridge for another 30 minutes to let the chocolate set completely. Once firm, pop them out of the molds, sprinkle with a tiny pinch of sea salt, and serve chilled. Silicone molds make popping them out effortless — just push up from the bottom.
Sunday Prep = Stress-Free Party Dessert
I make these on Saturday mornings when I have a slow coffee and an hour to myself. They sit in the fridge all weekend, and when Sunday dinner rolls around or a friend stops by unexpectedly, I just dip them in chocolate, sprinkle salt, and they look like I spent all day on them. The filling and crust can hang out in the molds for up to 3 days before dipping — just cover the tins with plastic wrap so they don’t pick up fridge smells.
- Fridge: Store in an airtight container for up to 5 days. The chocolate may soften slightly after day 3, but they still taste amazing. Keep them chilled until serving.
- Freezer: Yes! Freeze the undipped bites (with caramel) in a single layer for 2 hours, then transfer to a zip-top bag for up to 2 months. Dip them straight from the freezer — the cold helps the chocolate set faster.
- Reheat: No reheating needed — serve straight from the fridge. If you’re serving from frozen, let them sit at room temperature for 10 minutes before dipping or serving.
Things I Wish I’d Known the First Time
- Pack the crust like you mean it: The graham cracker base needs to be pressed down firmly — not just patted gently. If it’s loose, it will crumble when you try to eat it. I use the flat bottom of a shot glass to really compress it. Even if you think you’ve pressed enough, press one more time.
- Room-temperature cream cheese is not optional: I’ve made this with cold cream cheese because I was in a hurry, and the filling had tiny white lumps that never smoothed out. Set it out 45 minutes ahead. If you forget, cube it and let it sit for 15 minutes — it works in a pinch but isn’t as smooth.
- Don’t skip the chill before dipping: I know 2 hours feels like forever, but if the filling is even slightly soft, the warm chocolate will make it sag and the tops won’t look clean. Trust me on this one — I’ve ruined a batch by being impatient. The full 2 hours is worth it.
- Microwave chocolate in short bursts: Chocolate can seize in seconds if you overheat it. 30 seconds, stir, 30 seconds, stir — that’s the rhythm. Stop when most of the chips are melted and stir until the rest dissolve from the residual heat. Even if you overheat it a little, adding a teaspoon of coconut oil can bring it back to a dipping consistency.
Swaps That Actually Work
- Gluten-free: Use certified gluten-free graham crackers (like Schär or Pamela’s) for the crust. Everything else is naturally GF. The texture is identical — no one will know.
- Dairy-free: Use dairy-free cream cheese (Tofutti or Kite Hill) and a coconut-based whipped topping. Use dairy-free chocolate chips and a vegan butter substitute. The filling will be slightly less firm, so chill for an extra 30 minutes before dipping.
- Dark chocolate coating: Swap semi-sweet chips for dark chocolate (60-70% cacao) for a less sweet, more intense contrast with the caramel. I do this when I’m serving them after a heavy dinner — it feels more sophisticated.
- Peanut butter swirl: Warm 2 tablespoons of peanut butter and drizzle it over the caramel before chilling. The peanut butter and chocolate combo is ridiculous in the best way. My kids ask for this version every time.
- Holiday variation: Add a pinch of cinnamon or nutmeg to the graham cracker crust for fall vibes, or use crushed gingersnaps instead of graham crackers for a spiced holiday version. The gingersnap version disappears fastest at Christmas parties.
Testing Narrative: Troubleshooting No-Bake Chocolate Caramel Cheesecake Bites
Q: Why did my cheesecake filling stay soft and not hold its shape when I dipped it in chocolate?
A: The most common reason is not chilling long enough. The filling needs a full 2 hours in the fridge — 45 minutes isn’t enough, and even 90 minutes can be iffy. Another cause is over-folding the whipped cream: if you stir too vigorously, you deflate the air that helps the filling set. Next time, fold gently and stop as soon as it’s combined. If your kitchen is warm (over 75°F), the bites may also need an extra 30 minutes in the fridge.
Q: Can I use low-fat cream cheese or Neufchâtel?
A: Yes, you can use Neufchâtel (the block-style cheese with less fat) — it has about a third less fat than regular cream cheese. The filling will be slightly less rich and a touch softer, so chill for an extra 30 minutes. I wouldn’t use fat-free cream cheese, though — it has too much water and the filling won’t set properly.
Q: How do I know when the bites are fully set and ready for dipping?
A: Gently press the top of one with your fingertip — it should feel firm and slightly springy, not squishy or tacky. If your finger leaves an indentation, they need more time. Another test: gently try to lift one edge of a bite away from the mold — if it pulls away cleanly without sticking, the filling is set enough.
Q: Can I make these egg-free or vegan?
A: Yes! This recipe is naturally egg-free, so no changes needed there. For a vegan version, use dairy-free cream cheese, coconut whipped cream, vegan butter, vegan chocolate chips, and check that your graham crackers are vegan (some contain honey). The texture will be slightly softer, so chill for a full 3 hours before dipping. I’ve made this for vegan friends and they disappeared fast.
How Do You Store Chocolate Caramel Cheesecake Bites?
Q: How long do these cheesecake bites last, and how should I store them?
A: Store them in an airtight container in the fridge for up to 5 days. Layer them between sheets of parchment paper so the chocolate doesn’t stick together. After day 3, the chocolate may develop a slight bloom (white streaks) from condensation — they’re still safe to eat and taste the same, just not as pretty. If you’re serving them for a party, I recommend making them no more than 2 days ahead for the best appearance.
Q: Can I make these cheesecake bites ahead of time and freeze them?
A: Absolutely. Freeze the undipped bites (with caramel) in a single layer on a parchment-lined tray for 2 hours, then transfer to a freezer-safe container or zip-top bag for up to 2 months. Dip them straight from the freezer — the cold helps the chocolate set quickly. Add the sea salt right before serving so it doesn’t dissolve.
Q: What’s the best way to reheat these?
A: Don’t reheat them — they’re meant to be served chilled. If you’ve frozen them, thaw in the fridge for 1 hour before serving. If you want a slightly softer texture, let them sit at room temperature for 10 minutes before eating. The chocolate will stay firm but the filling will be creamier.
Q: What do you serve with these cheesecake bites?
A: They’re wonderful on their own, but I love serving them with a cup of strong black coffee or espresso — the bitterness balances the sweetness. For a dessert board, pair them with fresh berries (raspberries are especially good), small cookies, and a glass of dessert wine like a late-harvest Riesling. For kids’ parties, they’re perfect with a glass of cold milk. I also like to set out a bowl of extra caramel sauce for dipping because some people can’t get enough.
These little bites have become my go-to for everything from birthday parties to quiet Sunday afternoons when I want something that feels special without spending hours in the kitchen. The first time you pull a perfect one out of the mold — creamy, crunchy, salty, sweet — you’ll see why I keep coming back to them.
If you try them, drop a comment below — I love hearing how they turn out for you and any twists you added!
📌 Save these decadent chocolate caramel cheesecake bites for your next holiday party — they’re creamy, crunchy, and look like you spent all day making them.
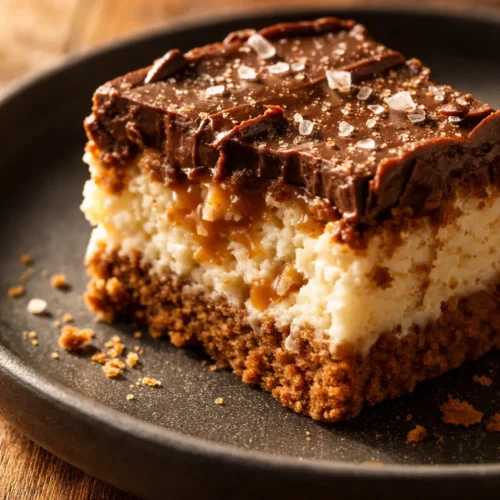
Decadent Chocolate Caramel Cheesecake Bites for Holiday Parties: Rich, Bite-Sized, and Stress-Free
Equipment
- Medium Bowl
- Large Mixing Bowl
- Mini muffin tins or silicone molds
- Spatula
- Microwave-safe bowl
- Refrigerator
Ingredients
Crust
- 1 cup graham cracker crumbs
- 2 tablespoons melted butter unsalted is best
- 2 tablespoons granulated sugar
Filling
- 8 oz softened cream cheese
- 1/2 cup granulated sugar
- 1 teaspoon vanilla extract pure vanilla recommended
- 1 cup whipped cream stabilized or store-bought
Topping
- caramel sauce use generous amount
- 1 cup chocolate chips semi-sweet or dark
- sea salt flaky, for garnish
Instructions
- Combine the crust: In a medium bowl, stir together 1 cup graham cracker crumbs, 2 tablespoons melted butter, and 2 tablespoons granulated sugar. Mix until every crumb looks damp and evenly coated — if you see dry spots, stir more. You want it to look like wet sand that holds together when you squeeze it.
- Press and chill: Press the crumb mixture firmly into the bottom of each mini muffin cavity or silicone mold. Pack it down tight — use the back of a small spoon or your thumb. Place the tins in the refrigerator to set while you make the filling. Really pack it in. A loose crust will fall apart when you try to eat it.
- Beat the cream cheese: In a large mixing bowl, beat 8 oz of softened cream cheese until it’s completely smooth with no lumps — about 1 minute with a hand mixer or 2 minutes by hand with a wooden spoon. Scrape the sides and bottom of the bowl at least once.
- Add sugar and vanilla: Gradually add 1/2 cup granulated sugar and 1 teaspoon vanilla extract, beating until well combined and the sugar is fully dissolved. Rub a tiny bit between your fingers — if it feels gritty, keep beating. This takes about 2 minutes with a hand mixer.
- Fold in whipped cream: Gently fold in 1 cup of whipped cream using a spatula. Start from the bottom and bring the mixture up and over, turning the bowl as you go. Stop as soon as you don’t see white streaks — over-mixing will make it dense. Be really gentle here. You want the filling to stay light and airy.
- Fill the molds: Spoon the cheesecake filling on top of the prepared graham cracker bases, filling each cavity to the top. Use the spatula to smooth the surface flat. A tiny offset spatula is perfect here, but the back of a spoon works too.
- Drizzle caramel: Drizzle caramel sauce generously over each cheesecake bite — a teaspoon or so per bite, depending on how much you love caramel. Swirl it gently with a toothpick if you want it to look fancy. I go heavy on the caramel because it sinks in slightly and creates a gooey layer under the chocolate.
- Chill for 2 hours: Refrigerate the bites for at least 2 hours, or until the filling is firm to the touch. Don’t rush this step — the filling needs to be fully set before you dip it in chocolate. I set a timer on my phone so I don’t forget.
- Melt and dip: Just before serving, melt 1 cup of chocolate chips in a microwave-safe bowl in 30-second intervals, stirring each time, until smooth. Dip the top of each chilled cheesecake bite into the melted chocolate, letting any excess drip off. Place them back on a parchment-lined tray. If the chocolate gets too thick, microwave it for 10 seconds to thin it out.
- Set the chocolate: Return the dipped bites to the fridge for another 30 minutes to let the chocolate set completely. Once firm, pop them out of the molds, sprinkle with a tiny pinch of sea salt, and serve chilled. Silicone molds make popping them out effortless — just push up from the bottom.
Notes
Related posts:
 Brown Sugar Peach Cake That Tastes Like a Bakery Treat — Ready in Under an Hour
 The Samoas Cookie Pie That Tastes Just Like the Box (Without the Wait)
 Low Calorie Banana Bread That Doesn’t Taste Like a Compromise — Finally
 Ninja Creami Salted Caramel Ice Cream That’s Creamy, Dreamy, and Ready in 24 Hours