
Every buffalo chicken dip I made before this one was a grainy, greasy disappointment. The cheese separated, the chicken was dry, and it tasted more like a science experiment than a party dip. This version stays creamy, cohesive, and dangerously scoopable from the first bite to the last. My sister texted me for the recipe before the first commercial break.
The short version: Real ingredients, proper technique, no canned chicken. It bakes up bubbly, golden, and perfectly scoopable every single time.
I’ve made this for every Super Bowl party, potluck, and “just because” gathering for the last four years. After a few dozen batches, I finally figured out exactly what makes it work — and what makes it fail. You get the benefit of all that experimenting.
- Serves: 8–10 as an appetizer (or 2 if you’re me and it’s dinner)
- Hands-On Time: 15 min | Total Time: 45 min
- Difficulty: Easy — your teenager could make this and impress everyone
- Cost per serving: ~$2.50
- Calories: ~320 per serving (worth every single one)
- Dietary Notes: Gluten-free as written. Can be made dairy-free with thoughtful swaps.
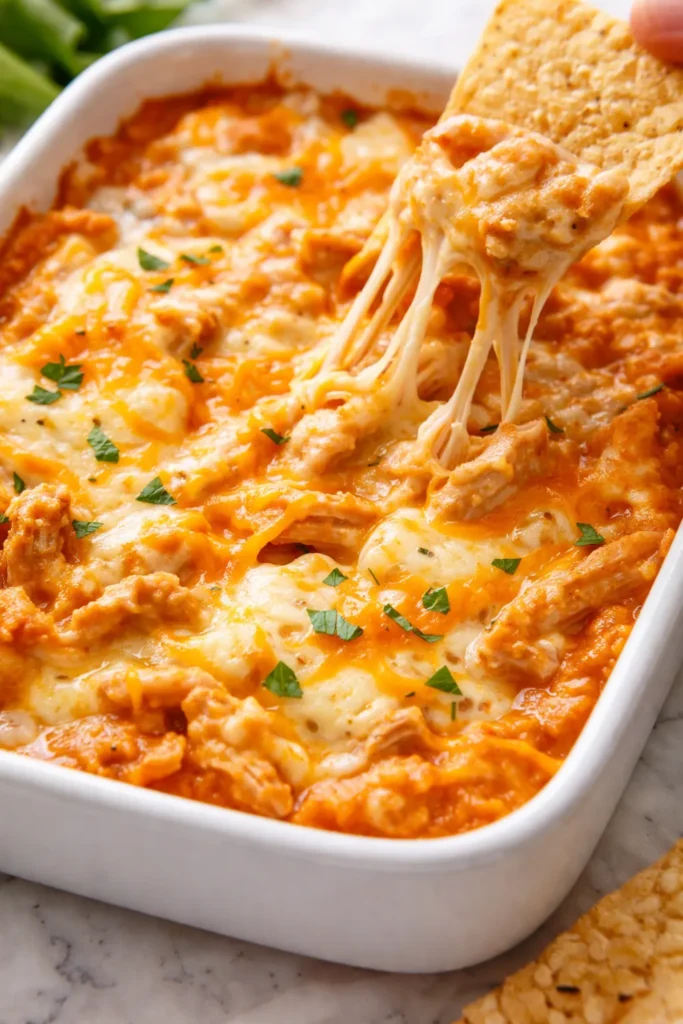
(Photo above: Close-up overhead shot of a white ceramic baking dish filled with bubbly buffalo chicken dip. A tortilla chip is angled into the dip, pulling up a perfect stretch of melted mozzarella and cheddar. The surface is golden brown in spots, with a little pool of hot sauce swirling around the edges. A small dish of blue cheese dressing and extra celery sticks sit in the background.)
The One Step Everyone Skips (Don’t Skip It)
The enemy of a good buffalo chicken dip isn’t the hot sauce — it’s the water. Pre-shredded cheese is coated in starch to keep it from clumping in the bag. That starch also stops it from melting into a smooth, cohesive dip. Instead, it turns into a grainy, separated mess.
Grinding your own cheese from a block takes three minutes. I time it. It removes the variable that ruins the texture. And using a mix of low-moisture mozzarella and sharp cheddar gives you that perfect pull-apart stretch without turning into an oil slick.
The second trick? Don’t over-bake it. You want it bubbly and browned on top, not bubbling for twenty minutes. The dip continues to set as it rests. Pull it out when it looks ready, let it sit for five minutes, and watch it transform into the creamiest version of itself.
What Goes In — Plus My Honest Notes
- 1.5 lbs (about 3–4 cups) shredded cooked chicken: Rotisserie chicken is my go-to for convenience, but I take the extra step of removing the skin and giving it a rough chop so there are no long stringy pieces. If I’m cooking chicken specifically for this, I poach it in a little water and a bay leaf for 20 minutes — it stays tender and shreds beautifully. Canned chicken works in a pinch, but drain it really well and fluff it with a fork. My kids can’t tell the difference when it’s mixed in, so don’t stress it.
- 8 oz cream cheese, softened: Full-fat is non-negotiable here. The low-fat version has added water and stabilizers that break down differently in the oven. Let it sit on the counter for 30 minutes before you start. I learned this the hard way when my first batch looked like scrambled eggs.
- 1 cup Frank’s RedHot Original sauce: This is the standard for a reason. It’s vinegary, moderately spicy, and it doesn’t have any weird thickeners. If you want it hotter, add a teaspoon of cayenne. If you want it milder, use 3/4 cup and add a splash of water. Frank’s is the only hot sauce I use here — not Tabasco, not Cholula. They’re great on eggs. This is Frank’s territory.
- 8 oz sharp cheddar cheese, freshly grated: Get the block. Grate it yourself. The pre-shredded stuff has cellulose that prevents it from melting smoothly. My husband thought I was being dramatic until I made him taste the two versions side by side. He hasn’t bought a bag since.
- 4 oz low-moisture mozzarella, freshly grated: This gives you the stretch. The cheddar gives you the flavor. Together, they’re a dream team. Simone calls this “the cheese pull cheese” and she means it as the highest compliment.
- 1/2 cup ranch or blue cheese dressing: I use ranch because that’s what my family expects, but a good chunky blue cheese stirred in at the end is a next-level move. If you’re using blue cheese, add an extra 1/4 cup of crumbled cheese on top before baking. Trust me.
- 2 green onions, sliced thin: For the finish. They add a pop of color and a little freshness that cuts through the richness. Don’t skip the garnish — it makes the whole thing look intentional.
What to Pull Out Before You Start
- A 9×9 or 8×8 baking dish (or any 1.5-quart casserole dish that fits what you’re serving it in)
- A box grater (or food processor with a grater disc — I use the food processor when I’m making a double batch)
- A large mixing bowl
- A rubber spatula (for getting every last bit of cream cheese into the mix)
- Measuring cups and spoons
Here’s How I Do It
This comes together fast once you start, so have all your ingredients measured and ready. It’s a one-bowl situation from there.
Preheat and Prep: Preheat your oven to 375°F. Let the cream cheese soften on the counter while you grate the cheese and shred the chicken.
- Mix the base: In a large bowl, beat the softened cream cheese with a spatula until it’s smooth and pliable. Add the Frank’s RedHot and the ranch/blue cheese dressing and stir until it’s completely combined and looks like a creamy, pale orange sauce. (📸 Photo tip: You’re looking for a smooth, uniform sauce with no streaks of plain cream cheese.)
- Fold in the cheese and chicken: Add the shredded chicken, the grated cheddar (reserve about 1/2 cup for the top), and the grated mozzarella. Fold everything together until the chicken and cheese are evenly distributed and every shred of chicken looks coated in that hot sauce mixture.
- Transfer to the dish: Scrape the mixture into your baking dish and spread it into an even layer. Top with the reserved cheddar cheese.
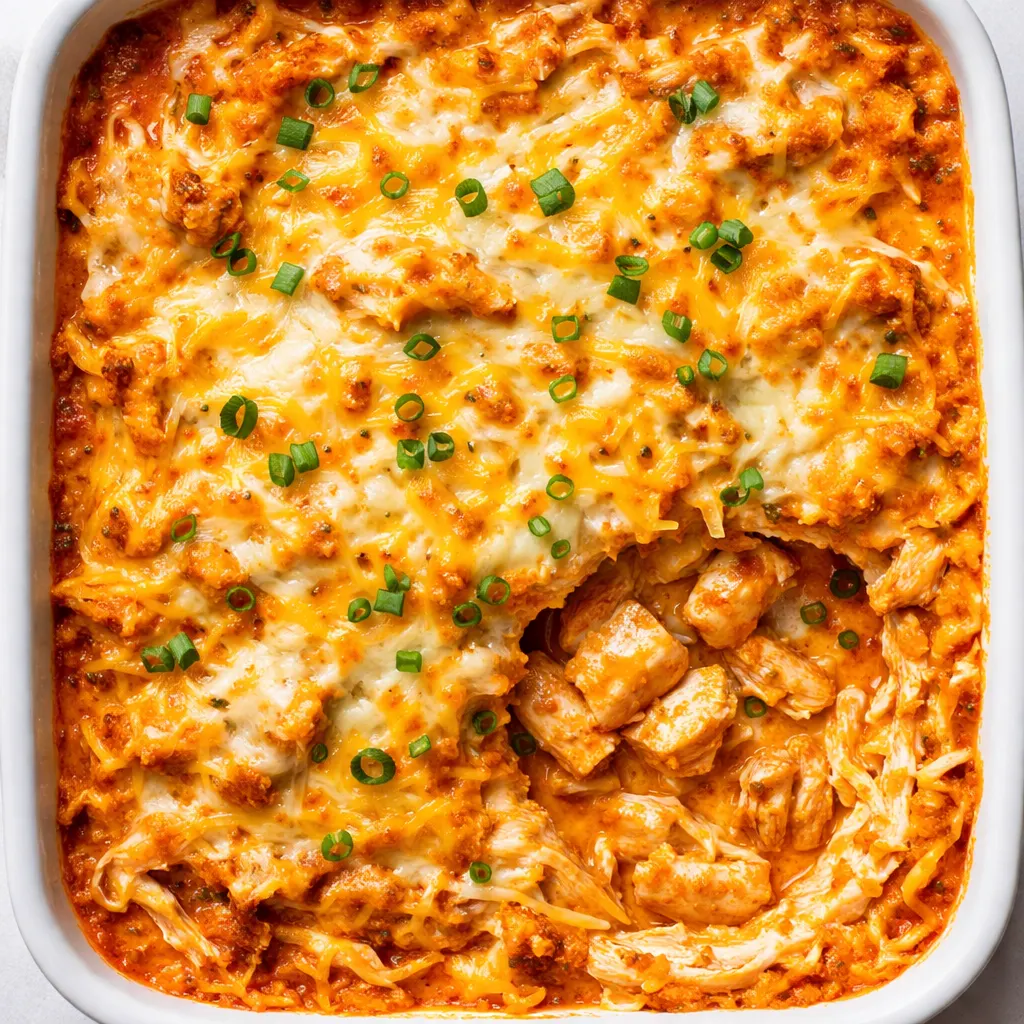
- Bake: Place the dish on the middle rack and bake for 20–25 minutes, until the edges are bubbly and the top is golden brown in spots. The dip should be hot all the way through — you’ll see it bubbling around the edges. (📸 Photo tip: When the bubbles break through the top layer of cheese and the whole thing looks like it’s about to overflow with goodness, it’s ready.)
- Rest and serve: Let the dip rest for 5 full minutes. This lets the cheese set up just enough that it’s scoopable without being runny. Top with sliced green onions and serve with tortilla chips, celery sticks, or toasted baguette slices.
Make-Ahead Notes (Because Parties Are Stressful Enough)
I almost always assemble this the night before and pop it in the oven when the first guest walks in. It’s the kind of recipe that actually gets better after sitting overnight — the flavors meld and the chicken soaks up all that hot sauce.
- Fridge: Assemble the dip completely (without the green onion garnish), cover tightly with foil, and refrigerate for up to 24 hours. Add 5–10 minutes to the bake time since it’s starting cold.
- Freezer: Yes, this freezes beautifully! Assemble it in a freezer-safe dish, wrap tightly in plastic wrap and foil, and freeze for up to 3 months. Thaw in the fridge overnight before baking.
- Reheat: The oven is your friend here. The microwave works in a pinch but can make the cheese slightly grainy. Cover with foil and reheat at 350°F for 15–20 minutes, then uncover for 5 minutes to crisp up the top.
Things I Wish I’d Known the First Time
- Don’t overmix the chicken: Once you fold the chicken in, stop. Overmixing can break the shreds into tiny pieces, and you lose that satisfying texture of a big chunk of chicken in every bite.
- Let the cream cheese come to room temp: I know it’s annoying to plan ahead, but cold cream cheese lumps up in the sauce. If you forget, microwave it in 10-second bursts until it’s soft — just don’t melt it.
- Taste the sauce before you add the chicken: The sauce is the foundation. If it needs more hot sauce, add it now. Once the chicken and cheese go in, it’s much harder to adjust the seasoning. Even if you mess this part up a little, it’ll still taste good — I’ve done it.
- Use a block of cream cheese, not the tub: The tub cream cheese has a higher water content for spreading. It doesn’t bake the same way. The block is the one you want.
Make It Yours: Easy Variations
- Smokier version: Substitute 1/2 cup of the Frank’s with a smoky hot sauce (or add 1 teaspoon of smoked paprika to the cream cheese mixture). This is the version I take to my neighbor’s BBQ — it gets devoured.
- Extra spicy: Add 1 tablespoon of cayenne pepper or 1 finely minced habanero (seeds removed unless you want a real kick) to the cream cheese mixture. My husband calls this “the one that wakes you up.”
- Blue cheese lover’s: Use blue cheese dressing instead of ranch, and fold in 1/2 cup of crumbled blue cheese before baking. Reserve another 1/4 cup for the top. This is my personal favorite version — the funk of the blue cheese with the heat of the hot sauce is a perfect match.
- Dairy-free: Use a good quality dairy-free cream cheese and shredded dairy-free cheddar and mozzarella. Miyoko’s and Violife are the brands that melt best in my experience. Simone has a friend with a dairy allergy, and this version has passed the kid test.
- Loaded potato version: Add 1 cup of cubed, cooked potatoes (or frozen hash browns, thawed) to the mixture before baking. It turns the dip into a heartier, almost meal-worthy situation.
Questions I Get About This Recipe All the Time
Q: Why did my dip turn out greasy and separated?
A: Ugh, I’ve been there. The most common culprit is pre-shredded cheese. The starches in the coating don’t melt cleanly, and the fat separates out. Grating your own cheese from a block is the fix. Over-baking is the second reason — the longer it bakes, the more the fat renders out. Bake it just until bubbly and golden, then pull it out.
Q: Can I make this in a slow cooker or Crock-Pot?
A: Absolutely. This is actually my preferred method for parties where I want to keep it warm all day. Brown the chicken first, then combine everything in the slow cooker and cook on low for 2 hours. Stir halfway through. You won’t get the browned top, but the texture will be incredibly creamy. I’ve tested this and it works!
Q: How long does it keep and can I freeze it?
A: It keeps in the fridge for up to 4 days in an airtight container. Reheat it in the oven or microwave. And yes, it freezes like a dream! I always make a double batch and freeze one for later. Thaw in the fridge overnight and reheat at 350°F until bubbly.
Q: What do you serve with buffalo chicken dip?
A: The classics are classics for a reason — tortilla chips (the scoop-shaped ones are ideal), celery sticks, and carrot sticks. But my family also loves it with toasted baguette slices, bell pepper strips, and even as a baked potato topping. My kids love it with “the little Scoops chips” — they’re like tiny bowls!
More Recipes My Family Makes on Repeat
If you liked this one, here are a few others that get the same reaction at our table — they disappear in 15 minutes:
- [INTERNAL LINK PLACEHOLDER: My Go-To Smoky Queso Dip] — Stovetop queso that stays smooth and never turns into a clumpy brick.
- [INTERNAL LINK PLACEHOLDER: Spicy Black Bean and Corn Salsa] — Zero cooking required, and it’s the first thing to empty at every potluck.
- [INTERNAL LINK PLACEHOLDER: Sheet Pan Nachos for a Crowd] — All the toppings, crispy chips, and no individual assembly required.
This is the dip I make when I want to show up to a party with something that looks like I spent hours on it — when really, I measured everything into a bowl and let the oven do the work. You deserve a dip that actually holds together, stays creamy, and makes everyone ask for the recipe. This is that dip.
If you try it, drop a comment below — I love hearing how it goes for you! Tag me on Pinterest so I can see your version.
📌 Save this creamy buffalo chicken dip recipe for your next game day party or potluck — it’s the appetizer that disappears every single time.
Buffalo Chicken Dip That Doesn’t Turn Into a Greasy Mess
Equipment
- 9×9 or 8×8 baking dish
- Box grater (or food processor with grater disc)
- Large Mixing Bowl
- Rubber spatula
- Measuring Cups and Spoons
Ingredients
For the Base
- 8 oz cream cheese, softened
- 1 cup Frank’s RedHot Original sauce
- 1/2 cup ranch or blue cheese dressing
For the Chicken and Cheese
- 1.5 lbs shredded cooked chicken (rotisserie or poached)
- 8 oz sharp cheddar cheese, freshly grated (plus 1/2 cup reserved for topping)
- 4 oz low-moisture mozzarella, freshly grated
For Garnish
- 2 green onions, sliced thin
Instructions
- Preheat oven to 375°F. Let cream cheese soften on the counter while you grate cheese and shred chicken.
- Mix the base: In a large bowl, beat softened cream cheese with a spatula until smooth. Add Frank’s RedHot and ranch/blue cheese dressing, stir until completely combined and creamy.
- Fold in cheese and chicken: Add shredded chicken, grated cheddar (reserve 1/2 cup for top), and grated mozzarella. Fold until evenly distributed.
- Transfer to dish: Scrape mixture into baking dish, spread evenly. Top with reserved cheddar.
- Bake: Place on middle rack and bake for 20-25 minutes until edges are bubbly and top is golden brown in spots.
- Rest and serve: Let dip rest for 5 minutes. Top with sliced green onions. Serve with tortilla chips, celery sticks, or toasted baguette slices.
Notes
Related posts:
 California Club Wraps That Actually Stay Crisp for Lunch — 20 Minutes
 Avocado Shrimp Ceviche That’s Ready in 20 Minutes and Tastes Better Than Any Restaurant
 Honey Garlic Sausage and Sweet Potato Sheet Pan Dinner That’s Actually Crispy — in 35 Minutes
 The Best Crockpot BBQ Chicken for Busy Weeknights: Tender, Tangy, Minimal Effort